Overview
What you will accomplish
In this tutorial, you will:Prerequisites
Before beginning, you will need:- A MoonPay account: If you do not have one, set one up on this page.
- An IDE (coding software): Some popular ones are Visual Studio Code and IntelliJ WebStorm. We will be using Visual Studio Code in this tutorial.
- A web browser: Any web browser will work. We will be using Google Chrome in this tutorial.
Implementation
Step 1: Set up a file for your integration
In your IDE, create a new file for your On-Ramp code. Ours will be calledon-ramp.html.
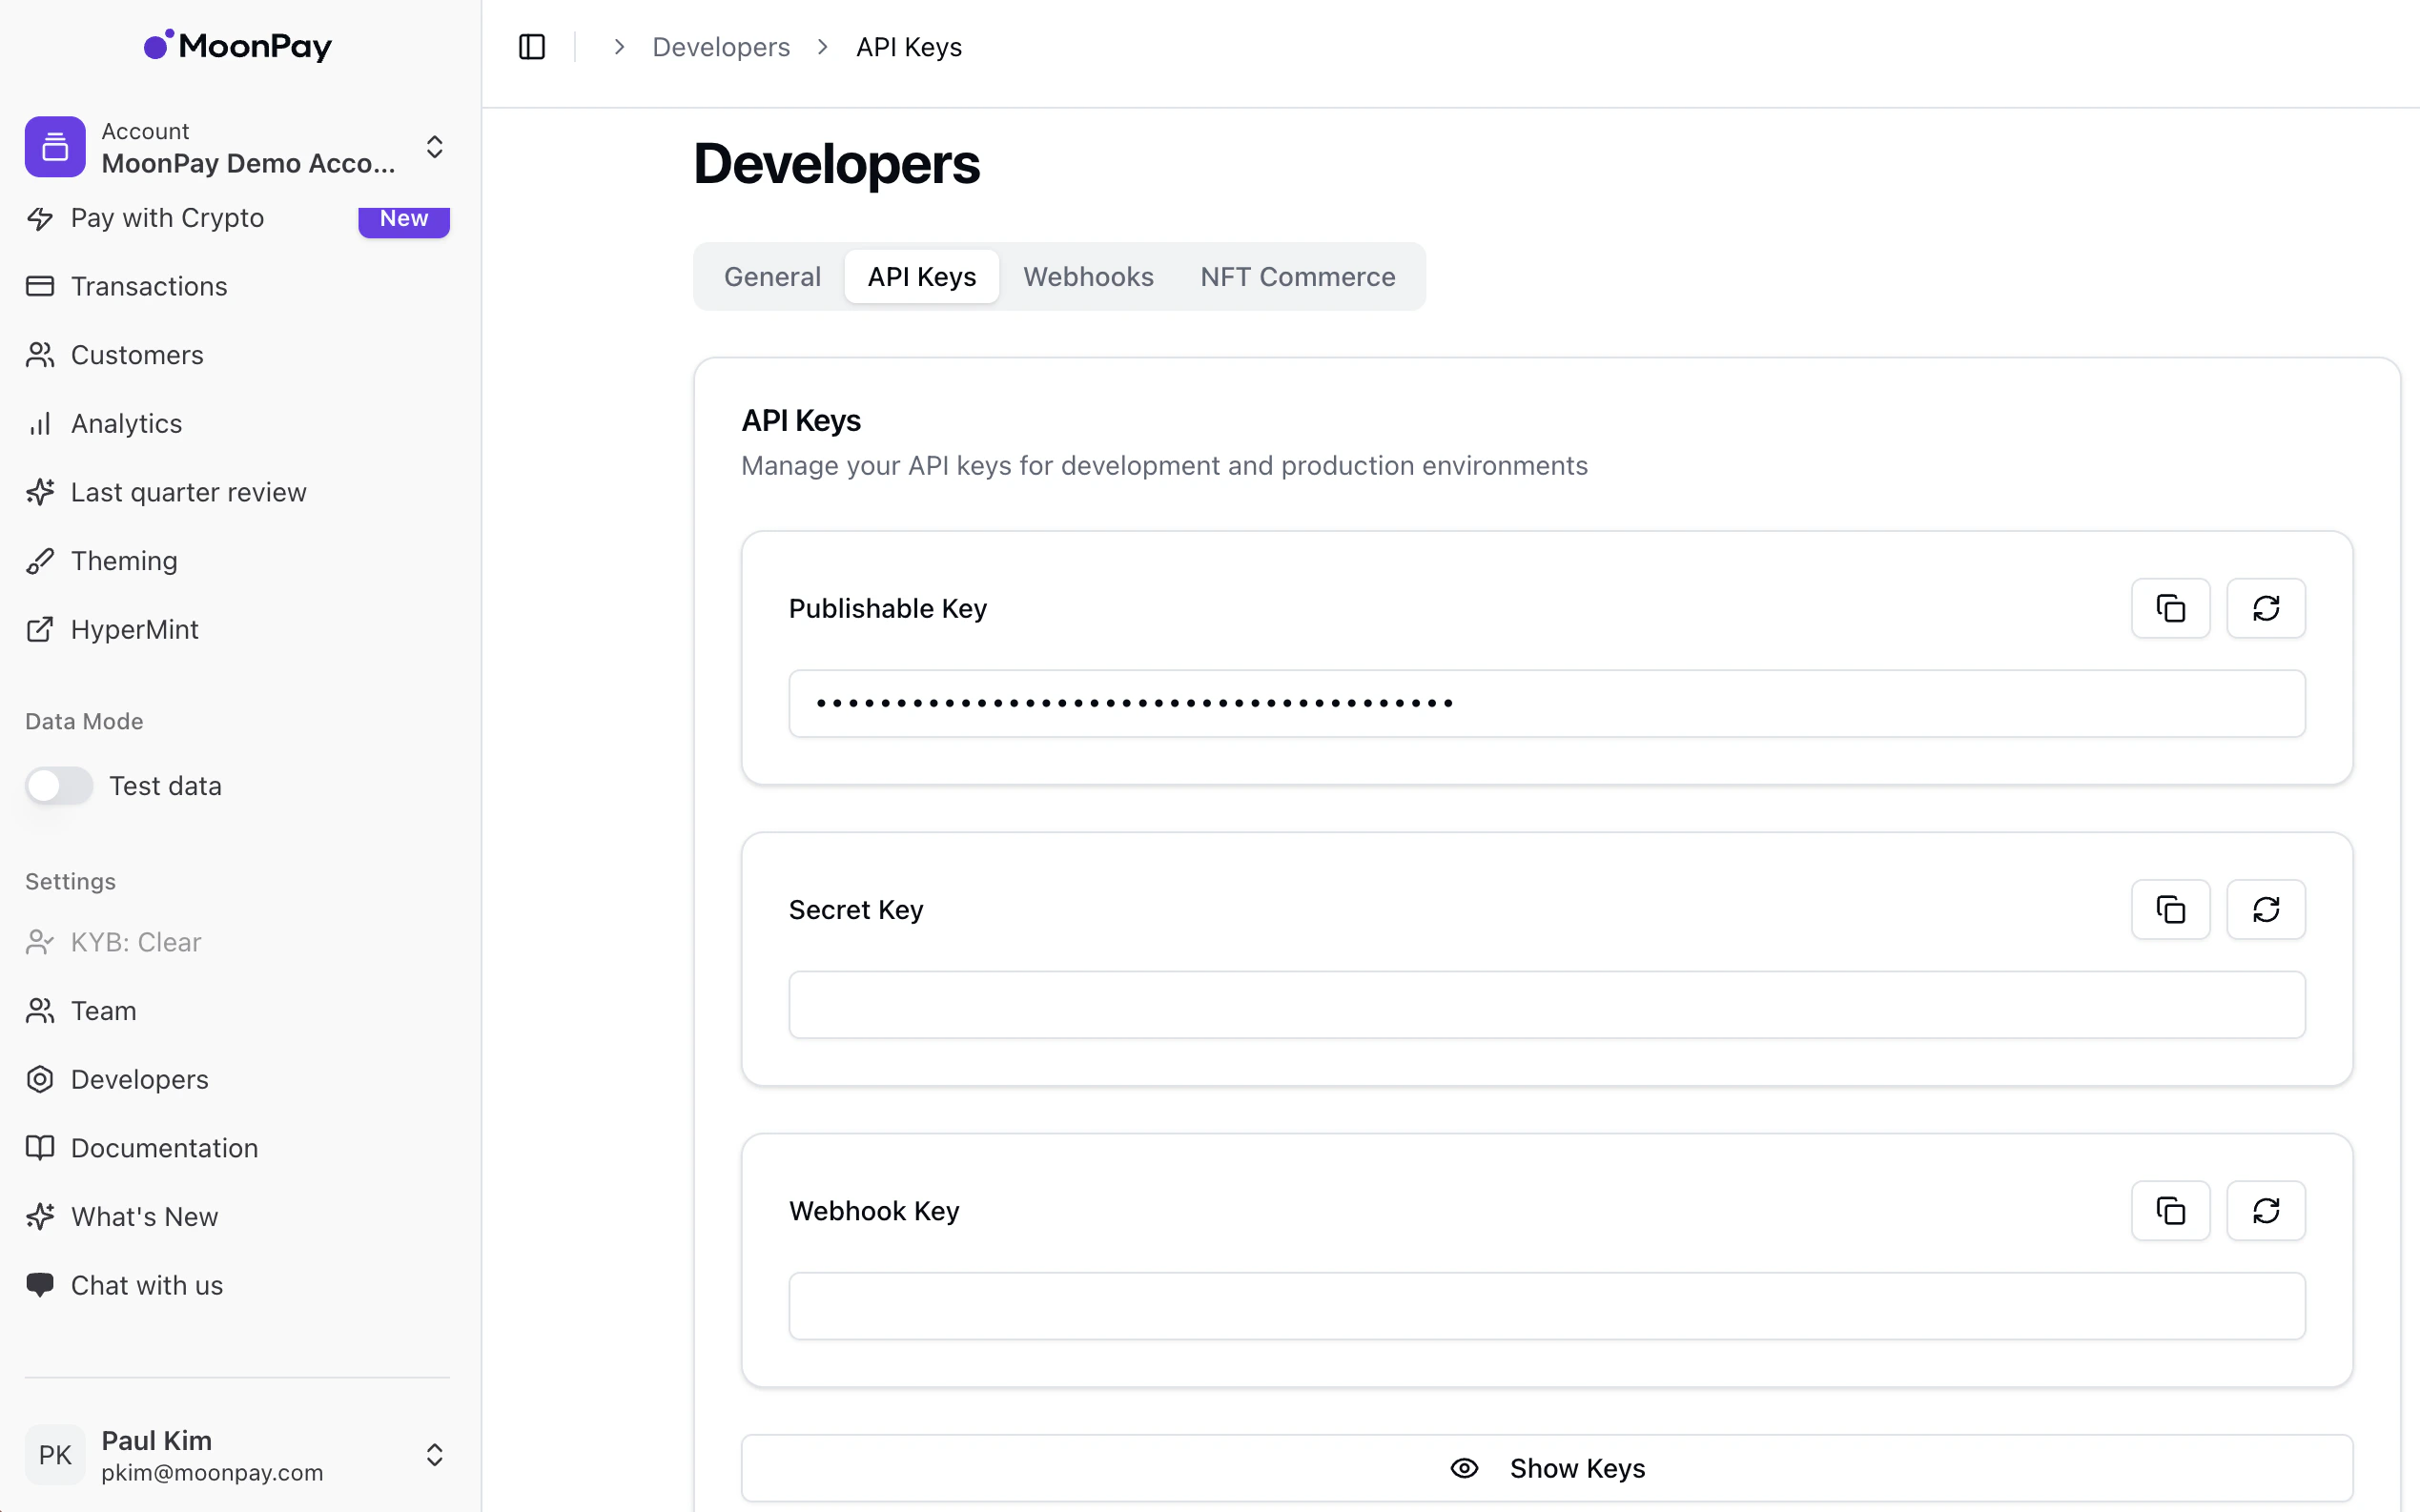
Step 2: Retrieve API keys from the MoonPay Dashboard
- Navigate to your MoonPay Dashboard and log in.
- Once logged in, navigate to the Developers tab on the sidebar → API Keys.
- Here, you will be able to copy your API keys. In this tutorial, we will be using the publishable test key.
Step 3: Insert HTML and code into on-ramp.html
- The code below will embed our Software Development Kit (SDK) directly into your HTML by way of
<script>tags. - You can think of this as a way of injecting code directly into HTML without having to create a separate linked file.
-
This script will detect when the HTML page loads and immediately run the JavaScript within the
<script>tags when the load has finished. Remember to replacepk_testwith your publishable API key from Step 1. -
You can customize widget functionality (currencies, amounts, etc.) by adding and removing parameters in the JavaScript, whilst still preserving proper formatting.
- All parameters can be found on this page of our documentation.
-
For example, if we would like to display the widget with a default of 100 GBP worth of BTC, and also specify the
walletAddressin the parameters so that the user is not prompted for theirs, we could modify the JavaScript like such:
SDK Setup
Step 4: Do a test transaction
- The first step of processing a test transaction using the MoonPay On-Ramp is to make sure that
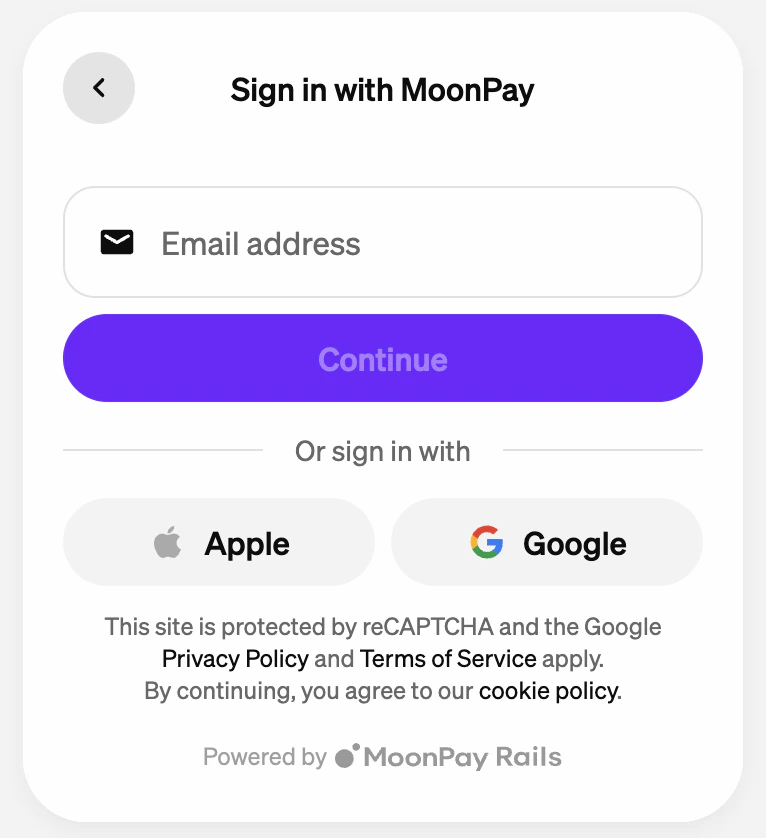
environmentis set to"sandbox", as shown above in the example code. This puts your widget in test mode. - Next, open up the widget, enter your email address, and log in.
- Next, you will be asked to enter a wallet address if one hasn’t been passed through the parameters already. If you already have existing wallet addresses with MoonPay, they will show up here. Any wallet address will work for a test transaction.
- Next, go and grab a test card from this page of our documentation.
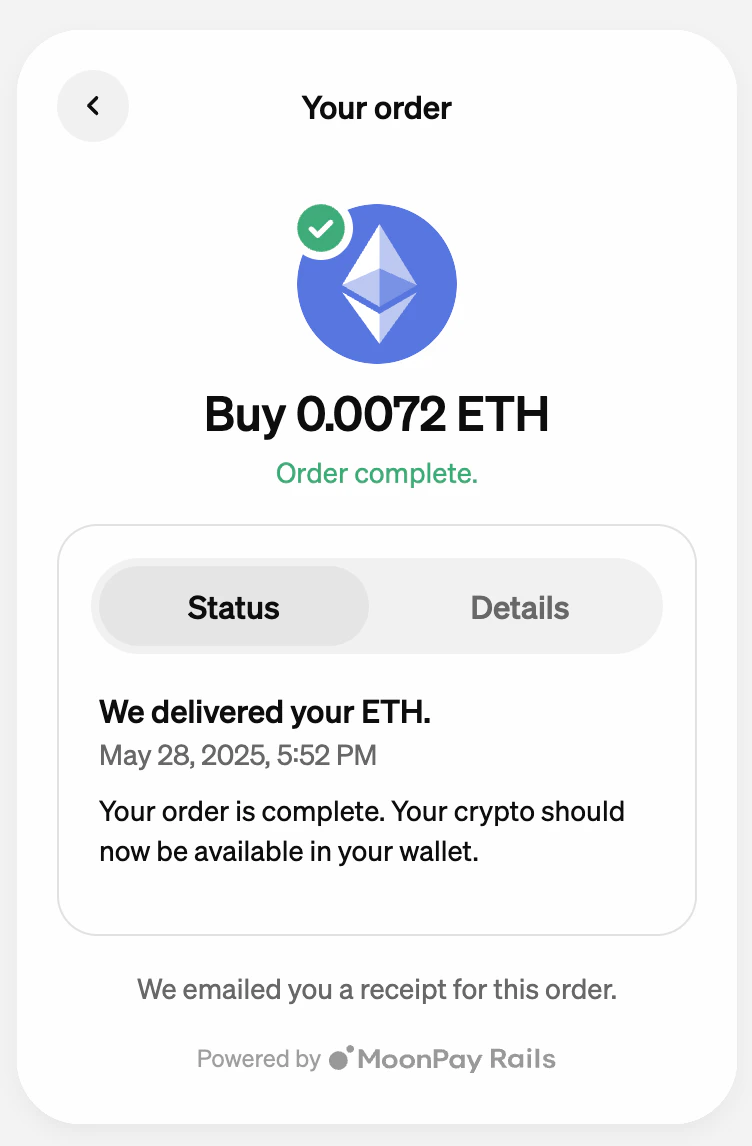
- If successful, you should see a screen that looks like the below.