Overview
What you will accomplish
In this tutorial, you will:- Configure Off-Ramps widget in a local environment
- Create a new folder for the implementation
- Initialize the widget in a file using HTML and JavaScript
- Edit the widget parameters
- Display the fully functional widget locally in your browser
Prerequisites
Before beginning, you will need:- A MoonPay account: If you do not have one, set one up through our team on this page.
- An IDE (coding software): Some popular ones are Visual Studio, IntelliJ IDEA, and Eclipse. We will be using Visual Studio in this tutorial.
- A web browser: Any web browser will work. We will be using Google Chrome in this tutorial.
Implementation
Step 1: Set up a file for your integration
In your IDE, create a new file for your On-Ramp code. Ours will be calledoff-ramp.html.
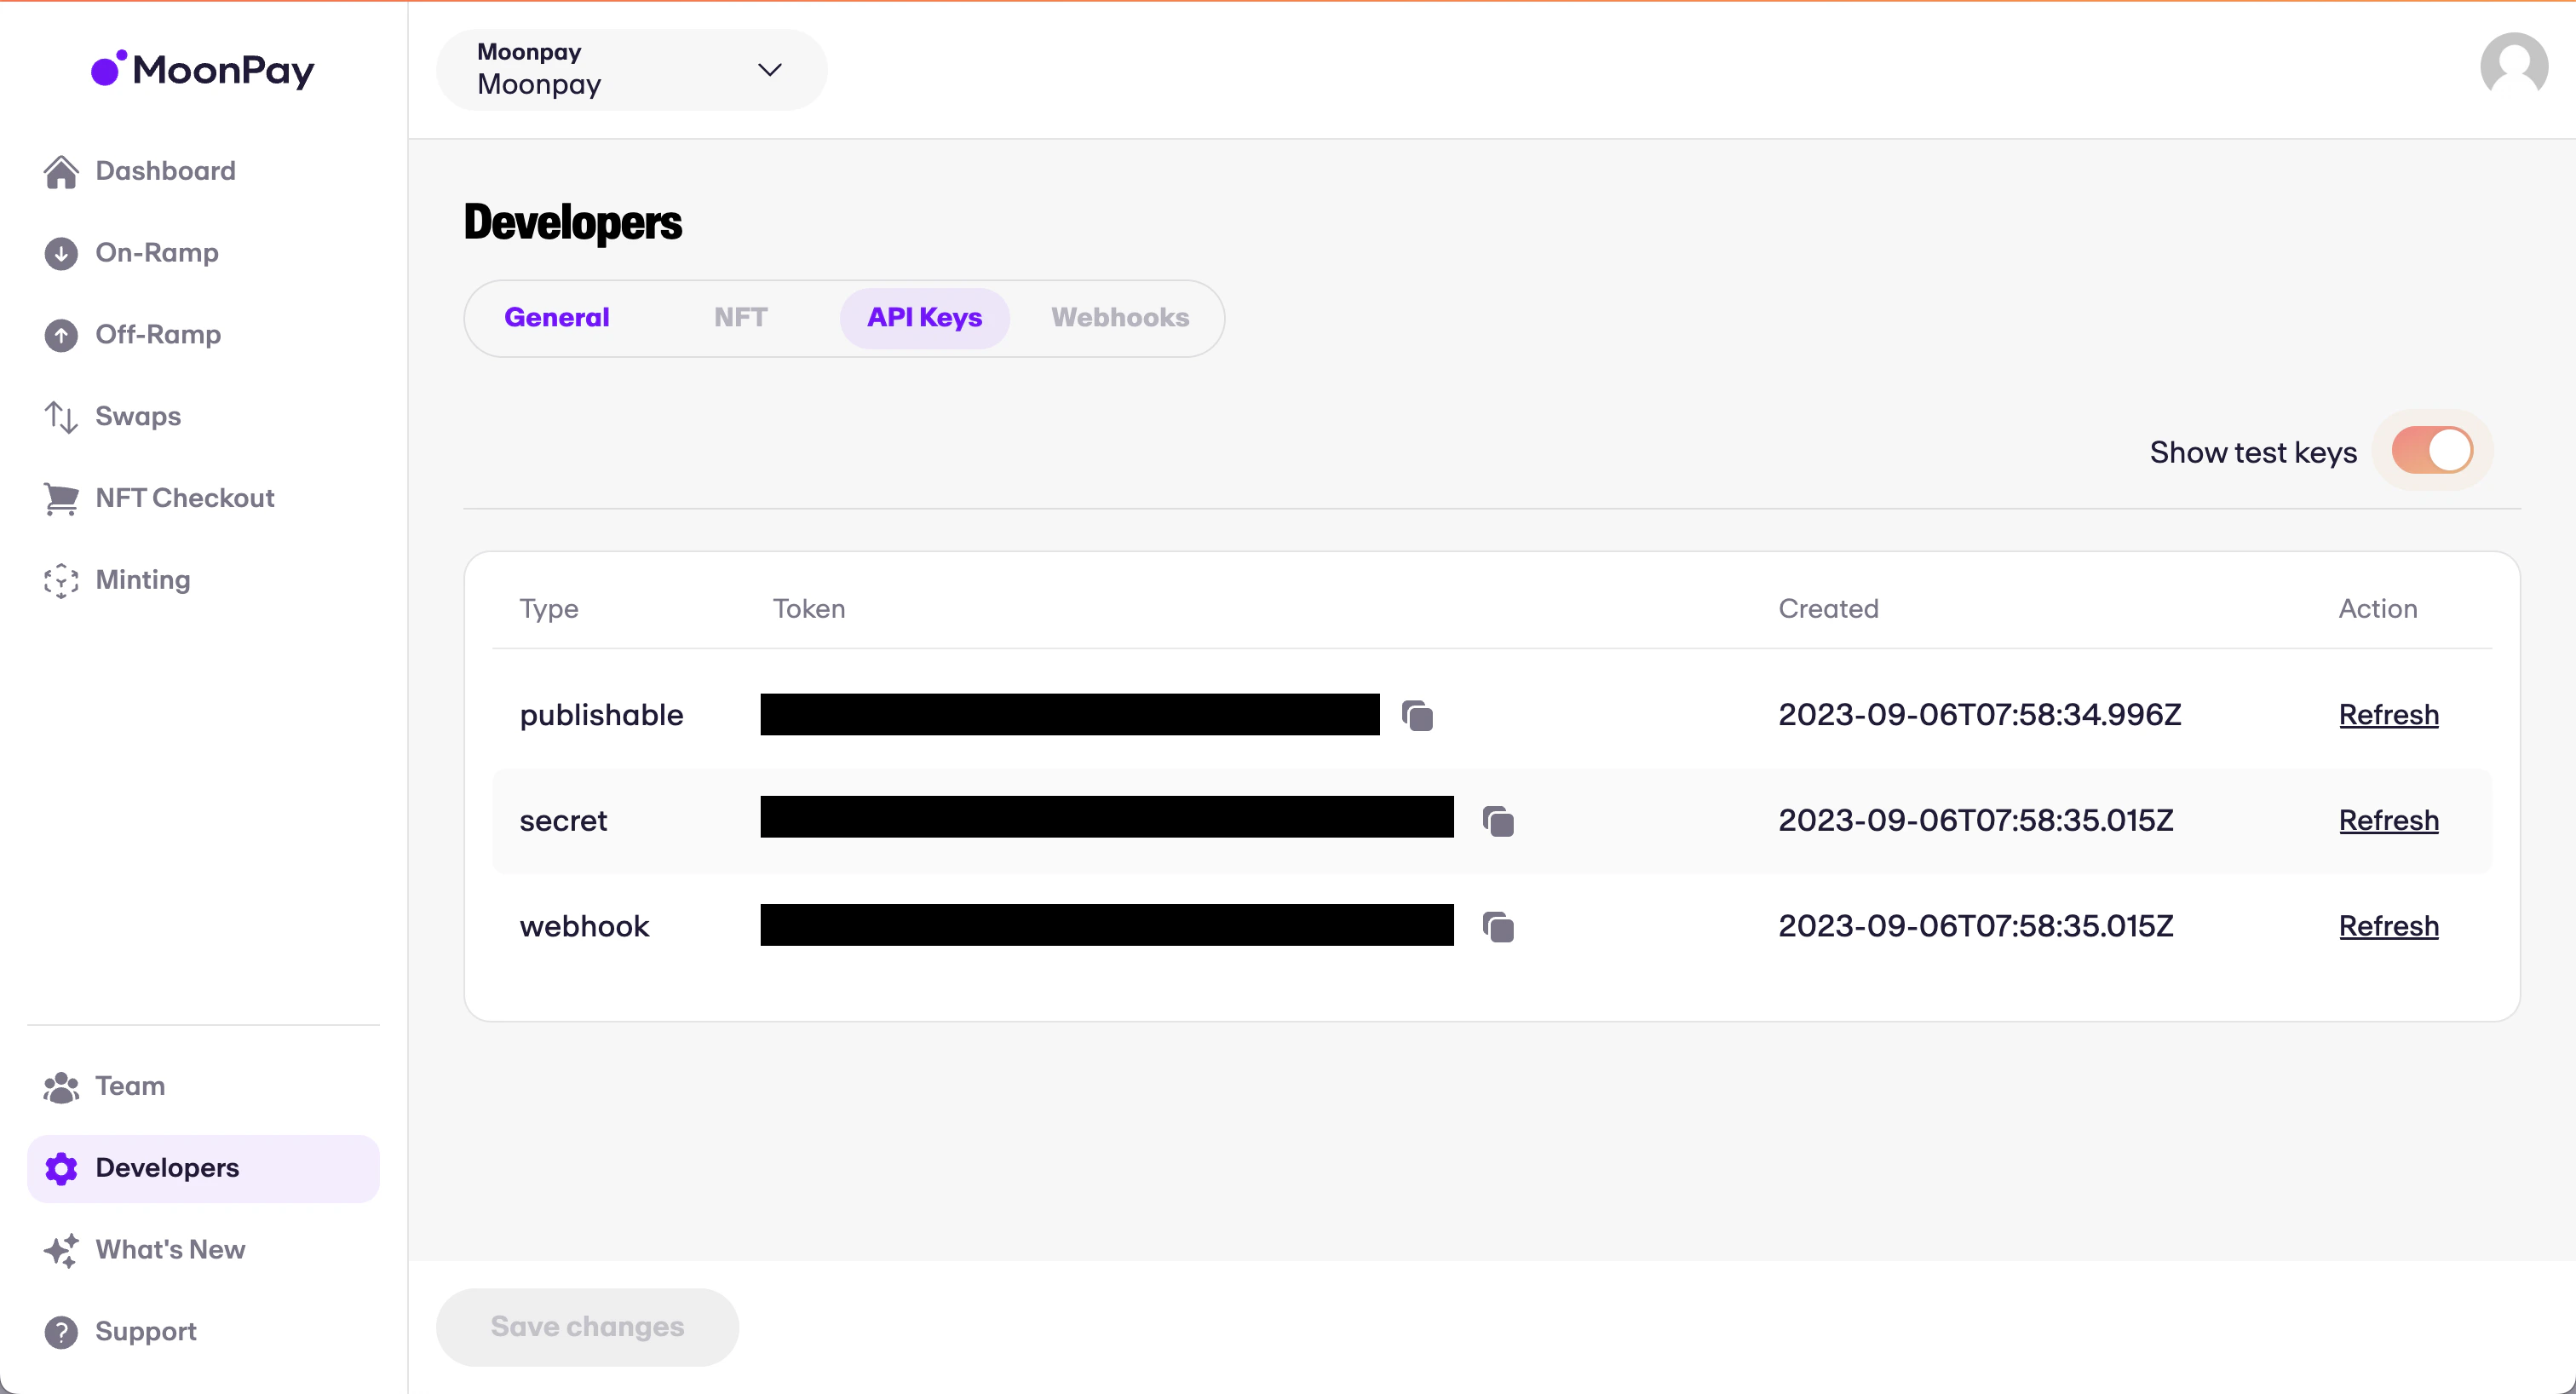
Step 2: Retrieve API keys from the MoonPay Dashboard
- Navigate to your MoonPay Dashboard and log in.
- Once logged in, navigate to the Developers tab on the sidebar → API Keys.
- Here, you will be able to copy your API keys. In this tutorial, we will be using the publishable test key.
Step 3: Insert HTML and code into off-ramp.html
- The code below will embed our Software Development Kit (SDK) directly into your HTML by way of
<script>tags. - You can think of this as a way of injecting code directly into HTML without having to create a separate linked file.
off-ramp.html
-
This script will detect when the HTML page loads and immediately run the JavaScript within the
<script>tags when the load has finished. Remember to replacepk_testwith your publishable test API key from Step 1. -
You can customize widget functionality (currencies, amounts, etc.) by adding and removing parameters in the JavaScript, whilst still preserving proper formatting.
- All parameters can be found on the off-ramp parameters page.
-
For example, if we would like to display the widget with a default of selling .05 BTC to EUR, and set
lockAmounttotruein the parameters so that the user cannot modify the sell amount, we could modify the JavaScript like such:off-ramp.html
Step 4: Do a test transaction
- The first step of processing a test transaction using the MoonPay Off-Ramp is to make sure that
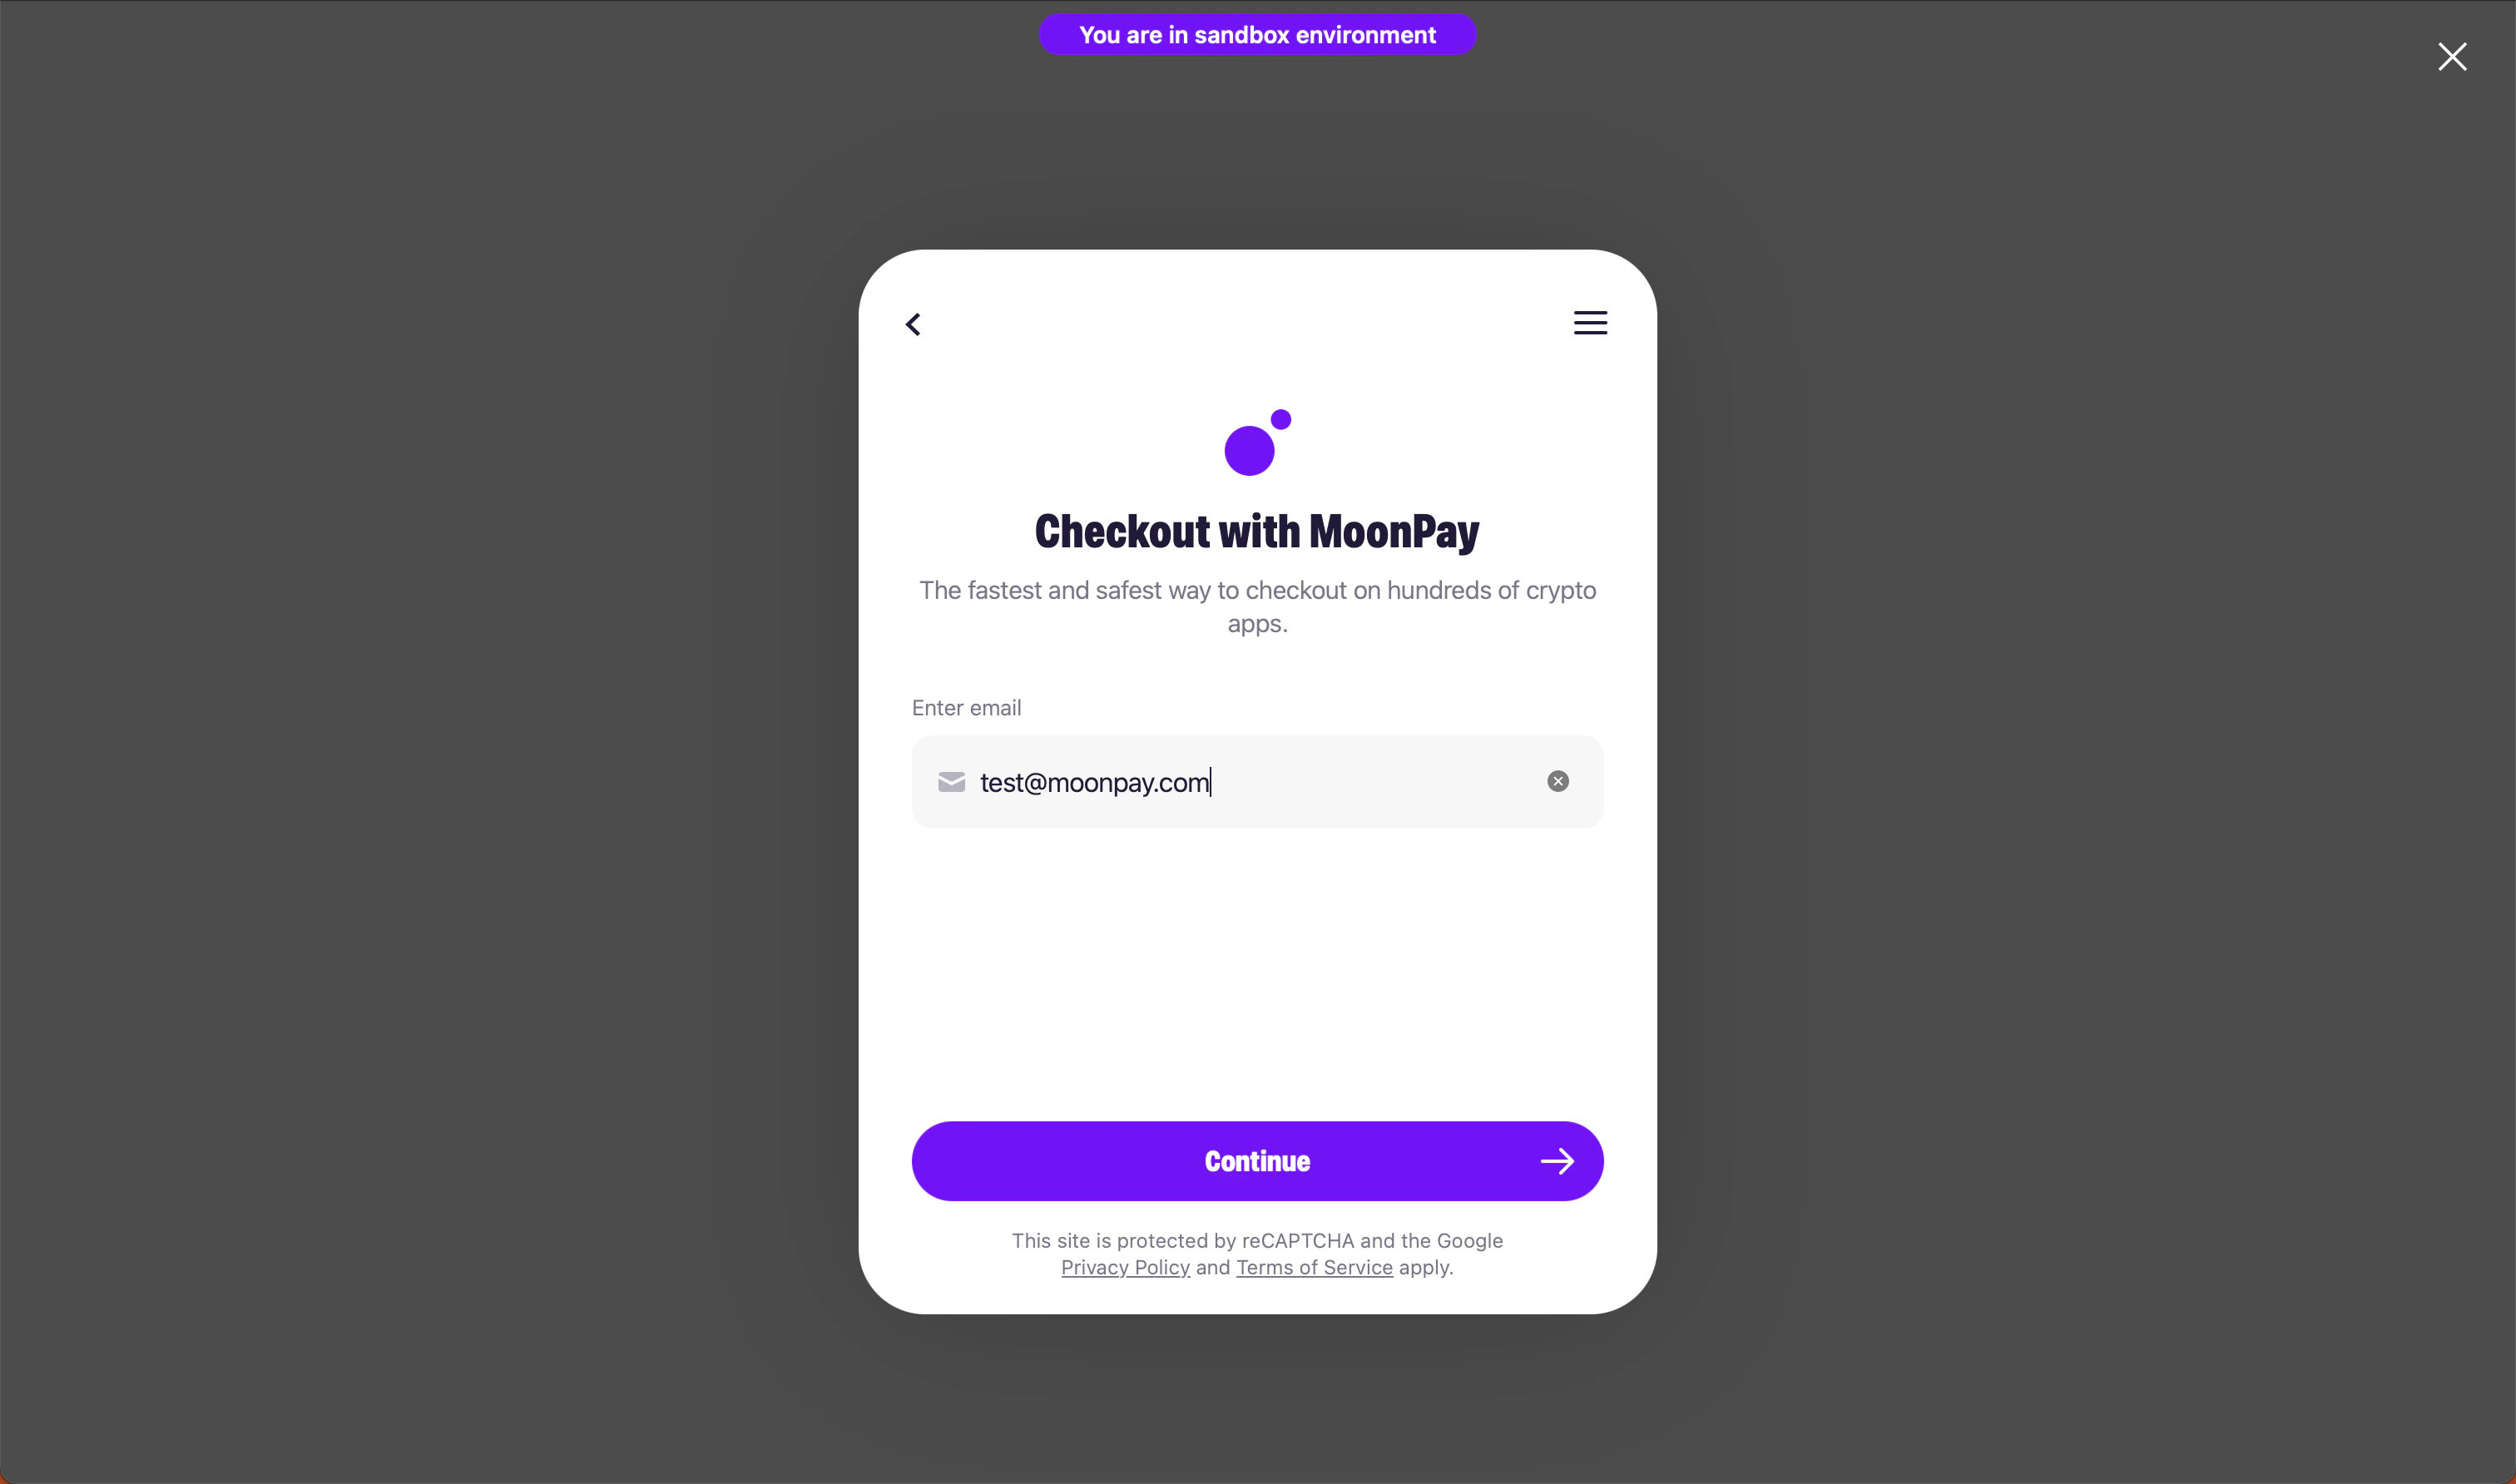
environmentis set to"sandbox", as shown above in the example code. This puts your widget in test mode. - Next, open up the widget, enter your email address, and log in.
- You will be prompted to configure your Sell transaction. Use our test credit card for off-ramp payouts when prompted for a payout method.
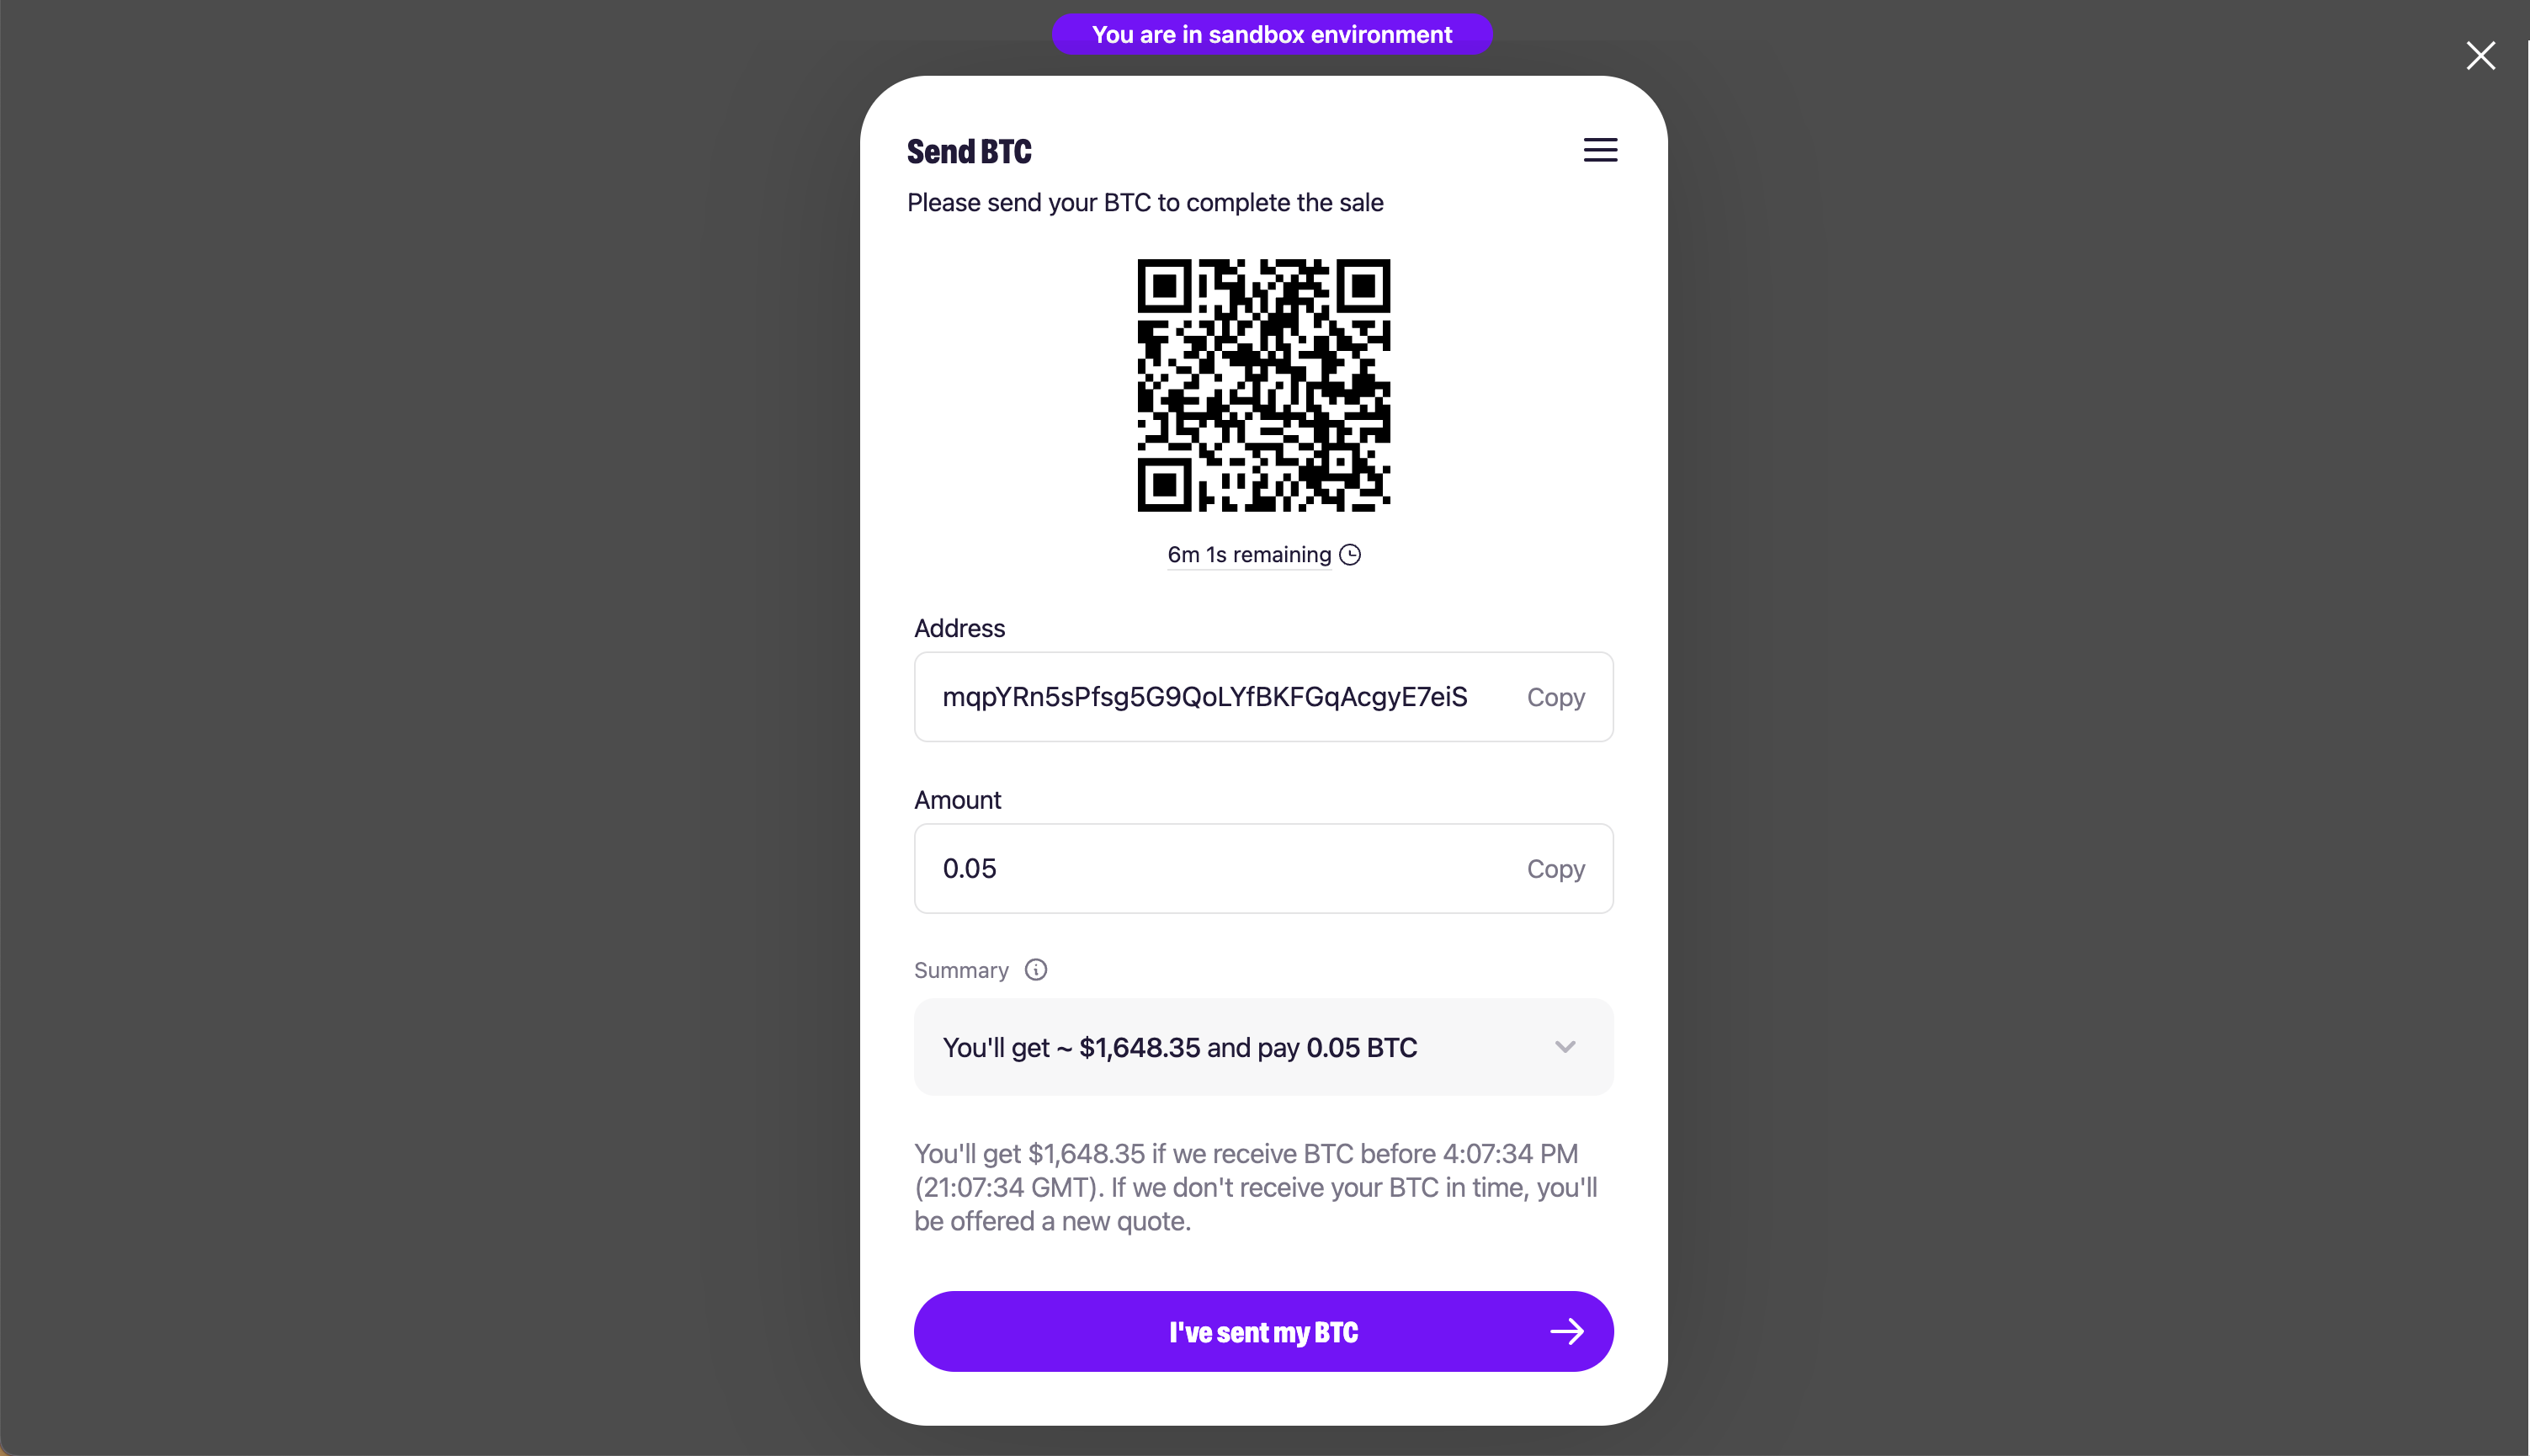
- You’ll eventually arrive at the below screen. Click on “View deposit details”.
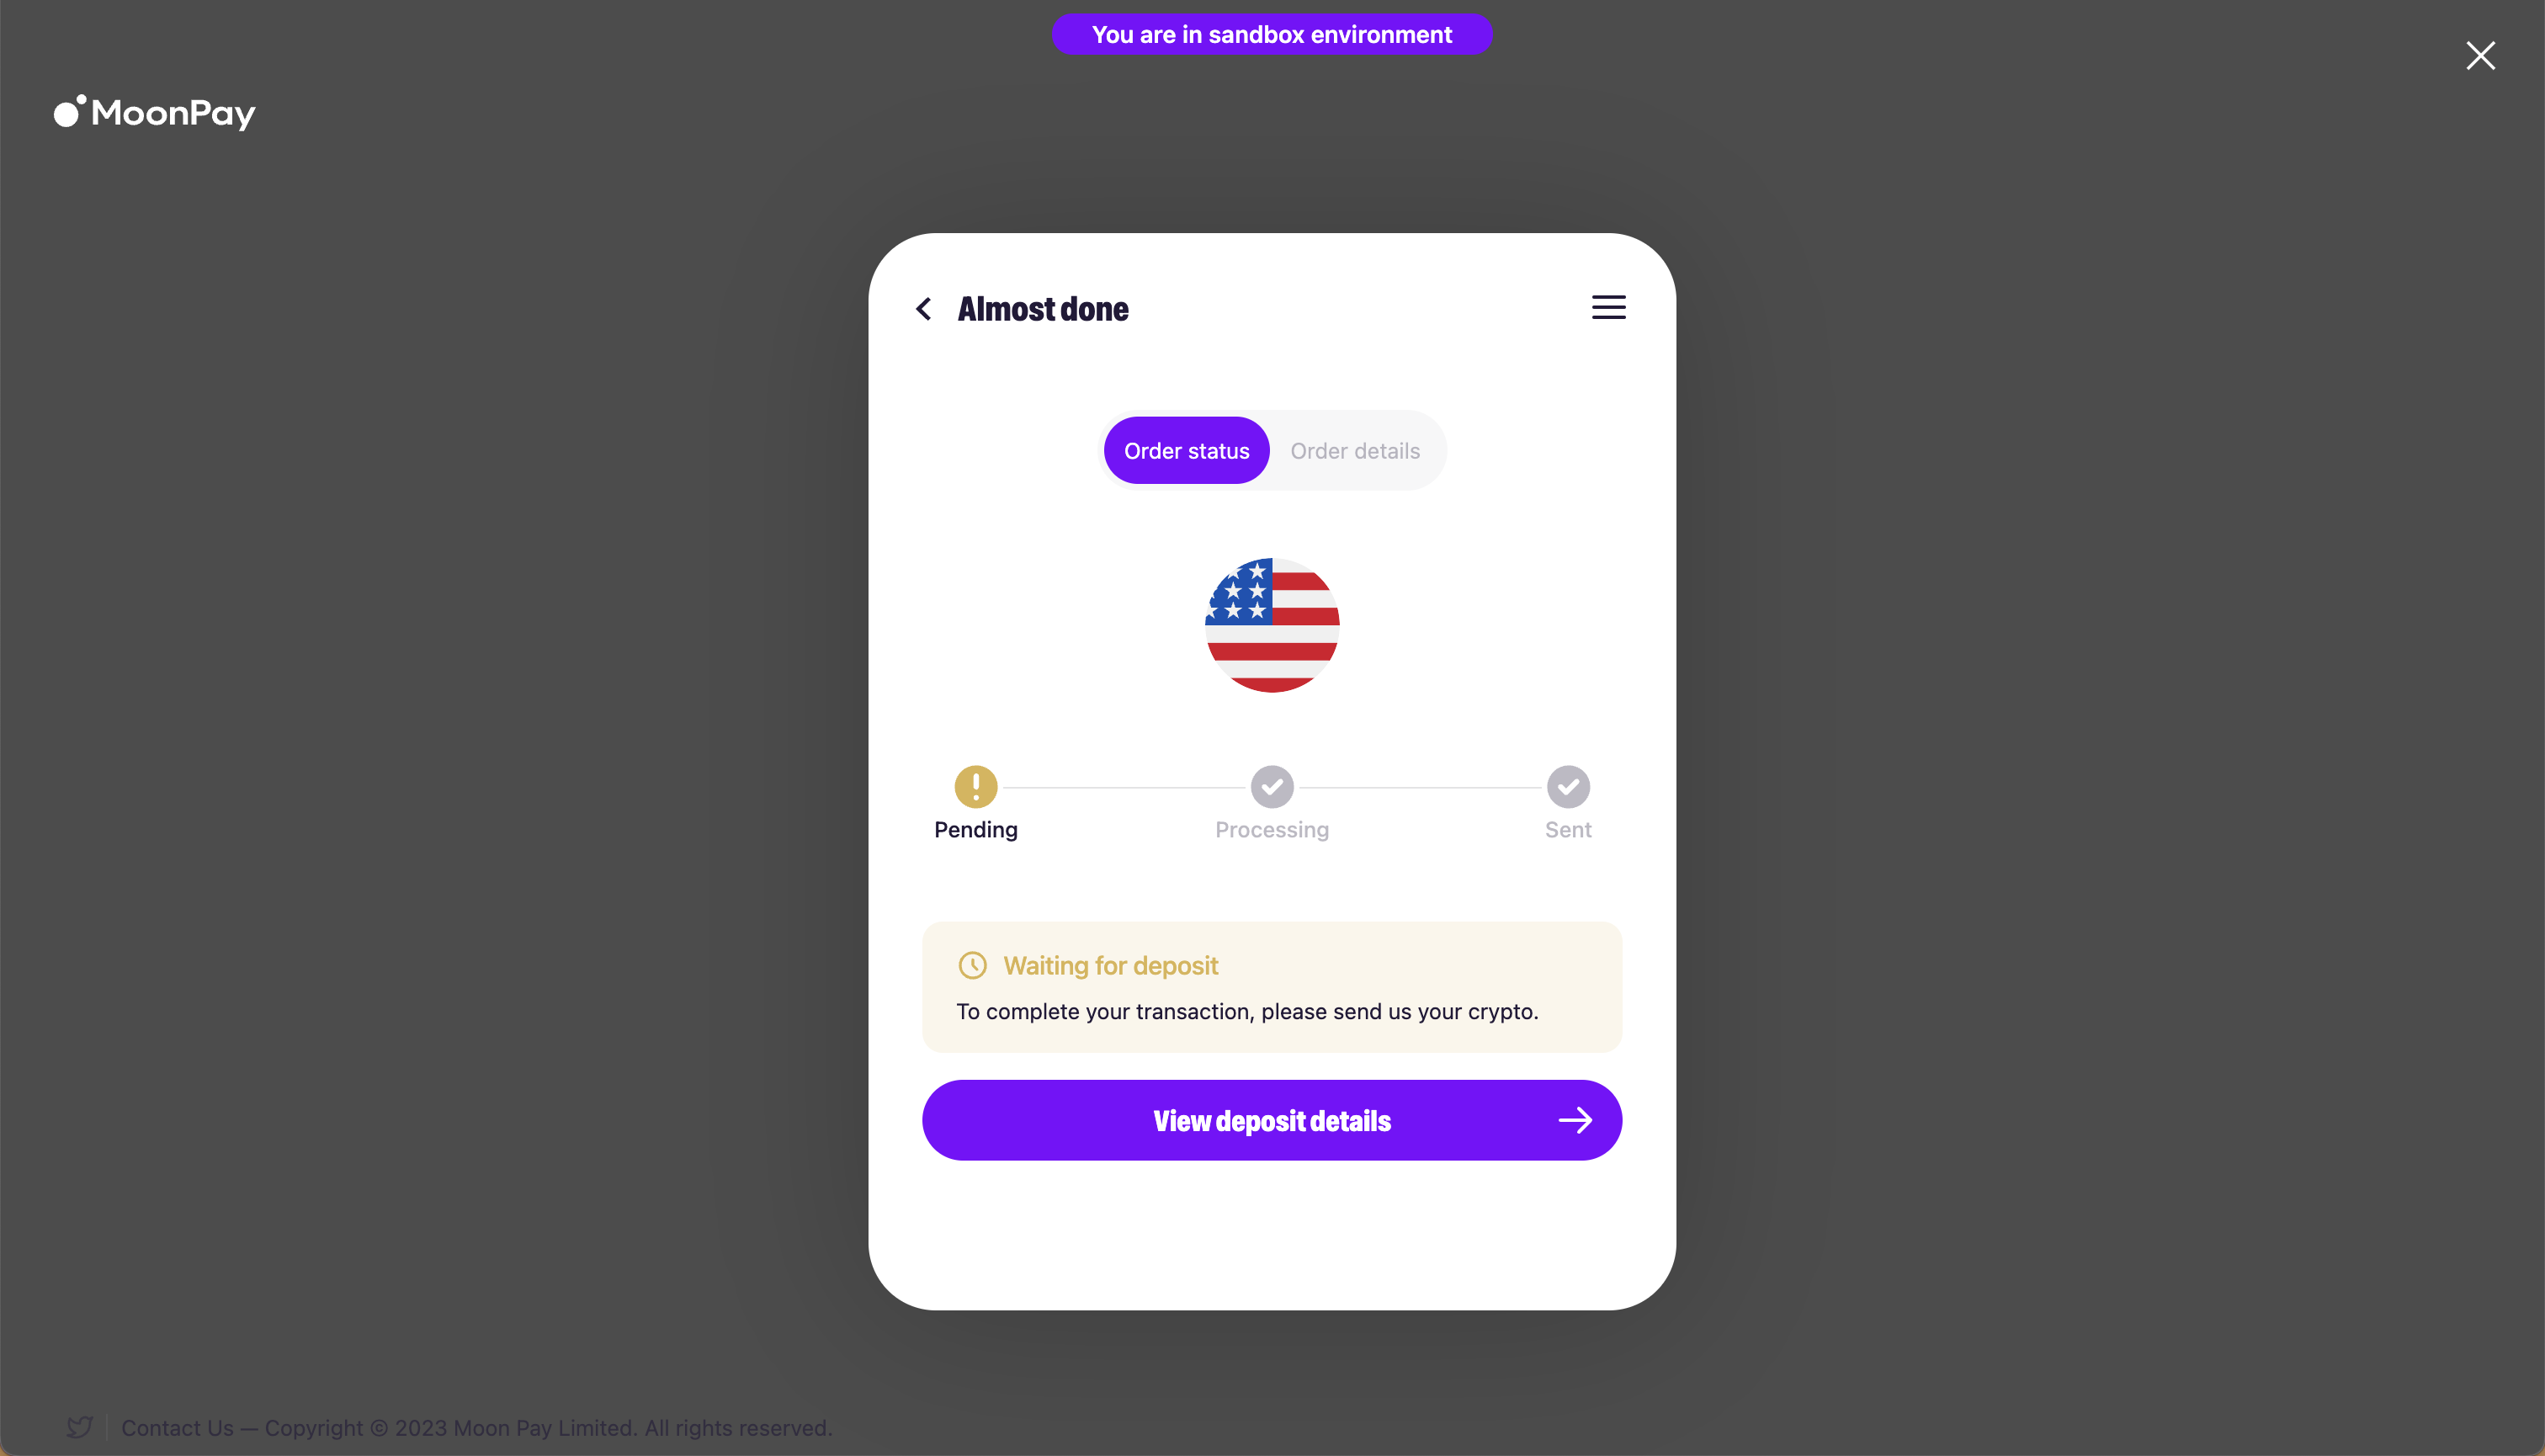
- You will now see the below screen, prompting you to send the previously specified amount of cryptocurrency to a wallet on the corresponding blockchain. Click the “I’ve sent my crypto” button.
- When successful, you will see green checks on the Pending, Processing, and Sent pages! ✅