
Authorization and token gating
HyperMint Authorize is a product which enable developers to authenticate users based on the ownership of a token in their wallet or based on membership of a static list of addresses.
It builds on top of HyperMint's Access List functionality and is designed to either be used stand alone or to be integrated into existing authentication implementations you already have in place.
Prerequisites
- Basic knowledge of JWTs
- An API (the examples shown are for NodeJS. Refer to the JWT website for a capacity list and plugins)
Setup
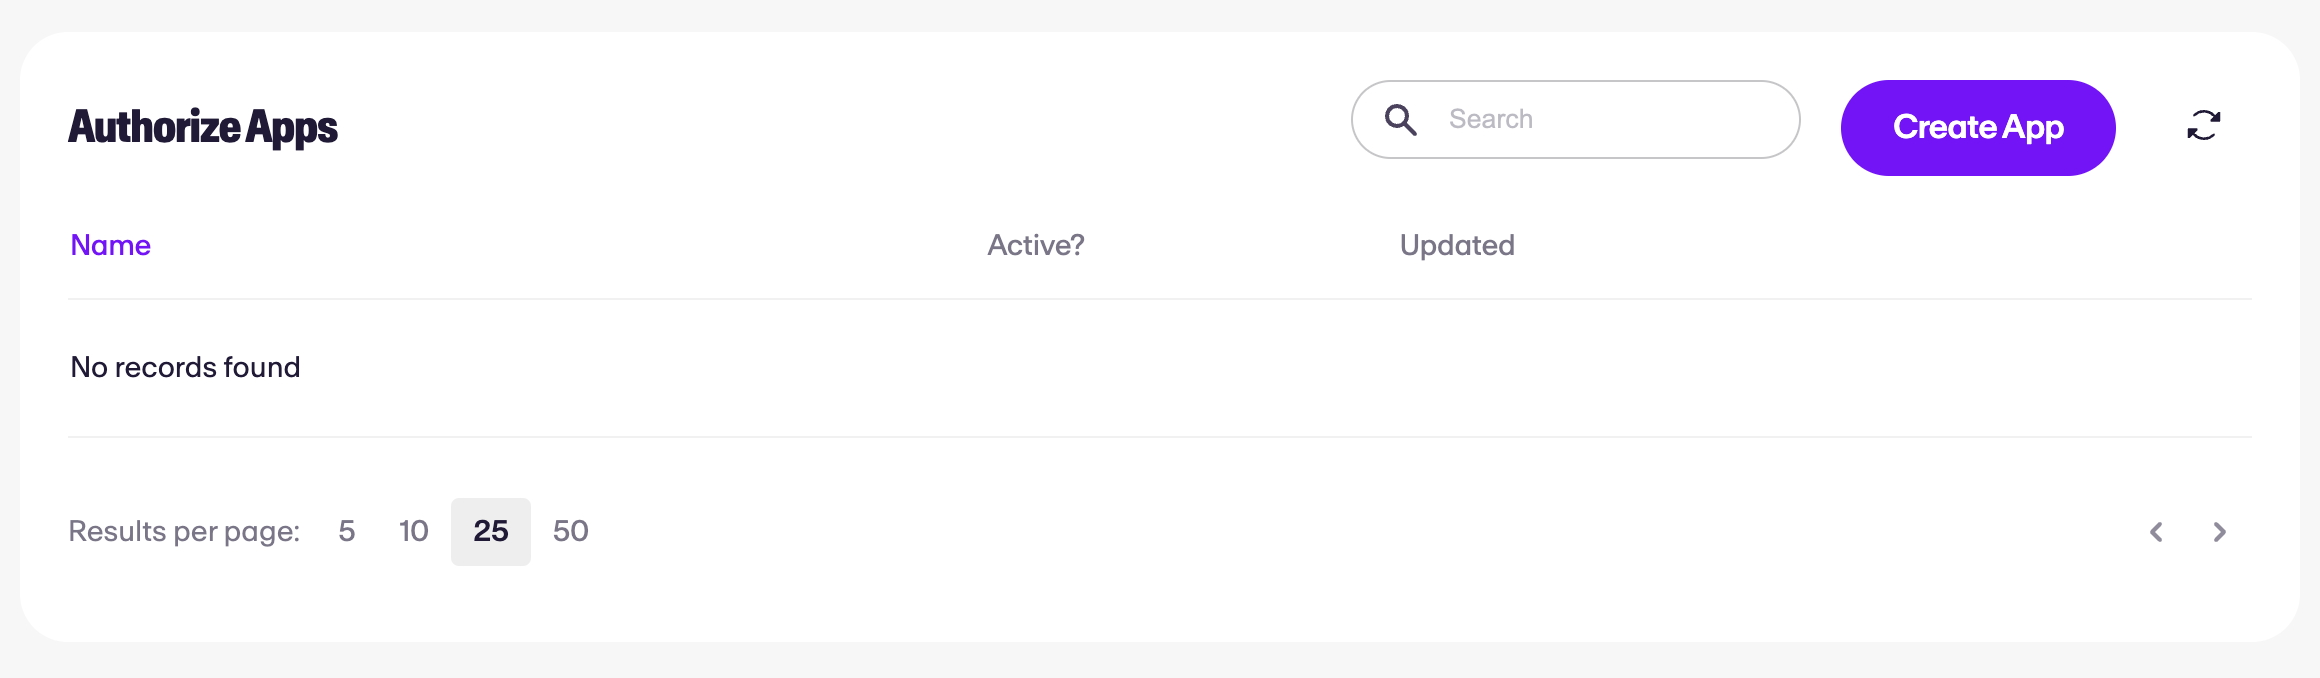
New authentication apps can be created via the dashboard by selecting Authorize from the navigation and clicking Create App in the top right.
There are two pieces of information which are required to continue:
- Name - a friendly name which describes the app's function. This is displayed to your users when authenticating and can be changed at any time
- Expires - the number of hours a user will remain authenticated once authorized. If you are managing your own session, this number can be reduced to 1

Upon clicking Create, a one time secret will be shown. This secret is used to decode the encrypted JWT token on your server. Keep this stored safely and securely.
Clicking 'Next' will show the authentication app screen as shown below.
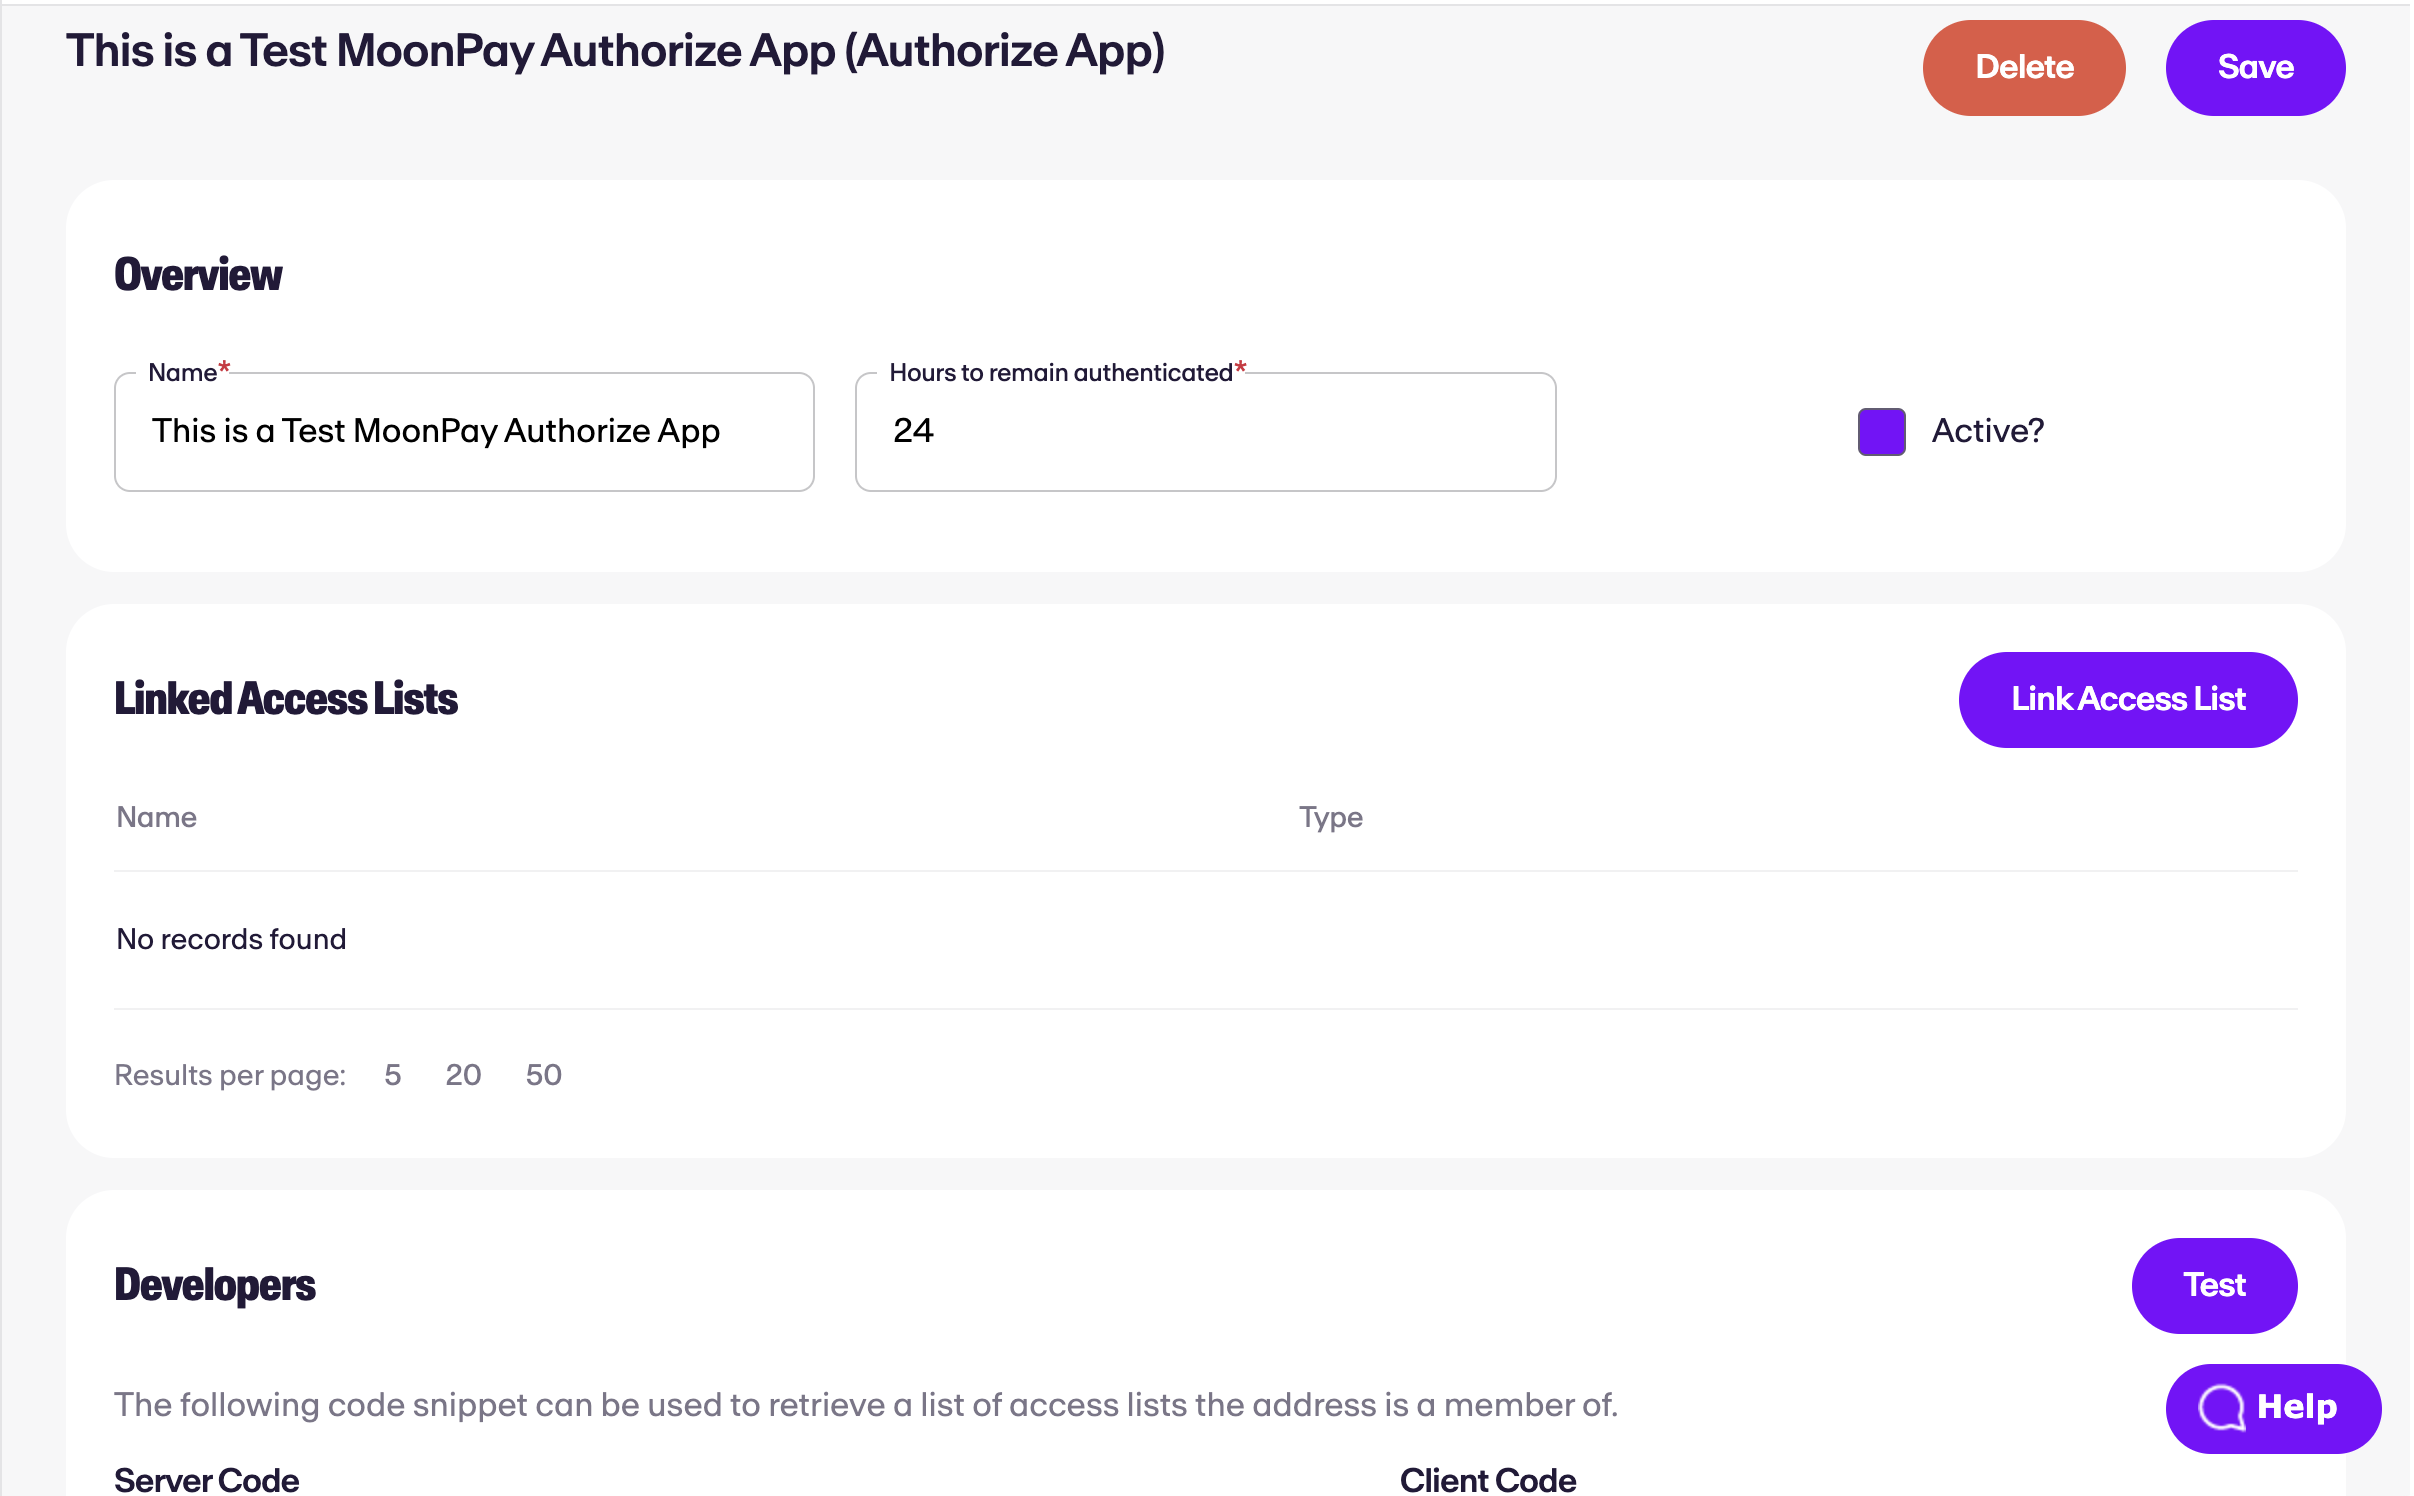
This screen allows you to:
- Enable/disable the app as needed
- Alter the name & expiry
- View code samples
- Attach access lists
Authorize enables you to re-use existing access lists or create new ones as needed. As with collections, any number of access lists can be attached including both static address lists and token owner lists. Find out more here.
Testing
From the authenticate app screen, you can test the attached access lists and experience before integrating with your own codebase.
This testing can be accessed by clicking Test App in the top right. A brief message explains what to do next but the most important part is that this test dialog only currently supports MetaMask wallets (the SDK supports most common wallet apps).
Clicking Start Test, will trigger the authentication flow and return logs detailing what happened.
Authentication Flow
The authentication flow can be triggered from the dashboard using Test App or via the Authenticate class within the SDK.
The following details the steps and possible errors:
- Wallet Discovery - If using the SDK, the user is able to choose a wallet app and connect a particular account
- Signature - The user is prompted to sign a unique message to prove ownership of the account. An example of this message is shown below. This prompt and resulting signature is only valid for 2 minutes
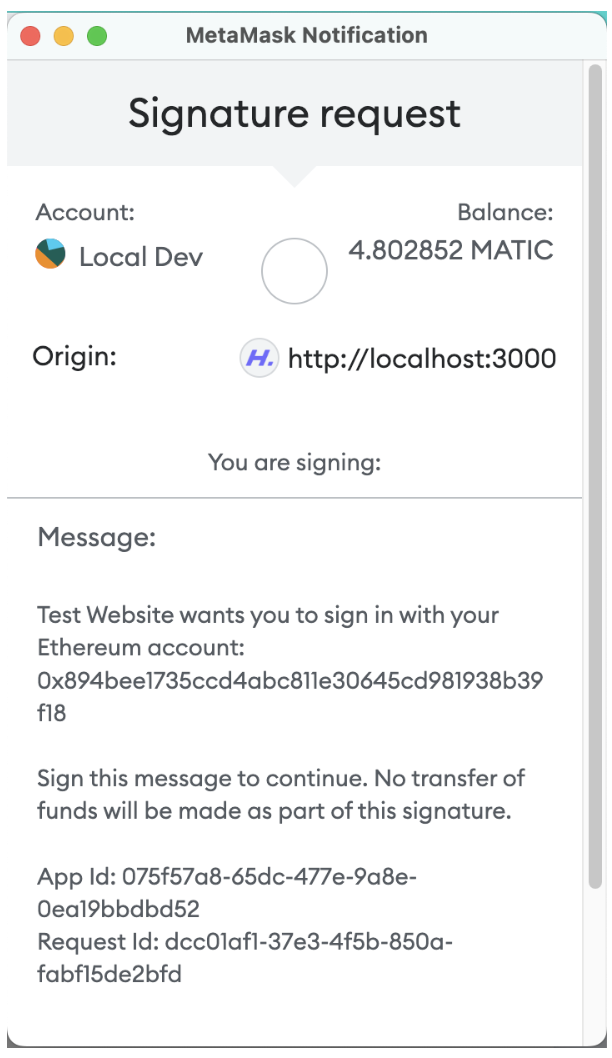
The message contains:
- Your app's name
- The address of the account the user is connecting with
- The app id
- A unique, temporary request id valid for 2 minutes
Once signed, the signature is sent to the HyperMint servers where it is verified. Assuming the signature is valid, a JWT is returned.
Possible errors:
Wallet not authorized by app- Wallet address is not a member of any access listInvalid request id- Request session has expired
Most other error messages are related to invalid parameters being passed in or the signature being manipulated after being signed.
Using the JWT Token
The JWT will be provided as a string. When using the Test App functionality, this string will be automatically decoded to show the contents.
Each token contains the following JSON object:
interface AuthenticateToken {
    appId: string; // Id of the authenticate app
    address: string; // Address of the wallet used to authenticate
    accessLists: string\[]; // Array of access list ids the wallet is a member of
}appIdis useful when using multiple authenticate apps within your experience to know which one was used- The array of access list ids can be used to further tailor any restrictions you wish to place on the user. E.g. must be a member of 2 out of 3 lists
The token can be decoded using the JWT library of your choice. For example, with NodeJS, the following code can be used.
const jwt = require('jsonwebtoken');

const decoded = jwt.verify(token, 'APP SECRET');
console.log(decoded);
From this point, it is up to you how you choose to use the token and store it if you choose to.
Integrating Existing Authentication
It is common to choose to manage your user's session yourself using libraries such as PassportJS or other cookie based sessions to enhance the experience and offer persisted data (e.g. profile, emails, preferences, etc). In this case, you would use the token in place of a traditional email/password login endpoint and return the session if the JWT is valid.
Feedback
Something not quite right, unclear or can't find what you are looking for? Please let us know at support.moonpay.com and we will get back to you as soon as we can.
Updated about 1 month ago