
Best practices when integrating
Optimizing Network Fees for Sell Orders
Insufficient network fee errors are a common cause of failed sell transactions. To prevent this issue, partners should display a network estimate and the adjusted crypto-to-fiat quotes on the initial Sell Crypto screen within your site/application. This approach allows users to adjust their sell amounts as necessary without needing to restart the flow, ultimately enhancing the user experience and improving conversion rates.
Example Scenario:
A user wishes to sell their full wallet balance of 1 ETH to fiat. To account for network fees, it is crucial that the partner obtains an up-to-date fee estimate using a reliable third-party API, such as the Fireblocks Network Fee API.
If the estimated network fee is 0.001 ETH, the partner should pass 0.999 (1 ETH - 0.001) of ETH via the MoonPay widget to initiate the sell transaction. The partner should also ensure that the user is presented with a price quote for the adjusted amount of 0.999 ETH, along with a clear explanation of the network fees and the reason for the difference from their wallet balance.
When the send transaction is created by the partner, the network fee specified in the transaction is fixed and separate from the amount being sent. This design ensures that miners can only take the fee set by the wallet provider, and cannot exceed this amount. Therefore, MoonPay will still receive the exact 0.999 ETH, regardless of any fluctuations in network fees after the transaction is initiated.
Best Practices:
- Automate Network Fee Estimations: Partners should always automate gas fee estimations for users. Prioritizing faster transaction speeds will significantly enhance the user experience compared to choosing slower, less costly network fees.
- Update Network Estimates at Execution: Always update the network fee estimation at the moment of transaction execution. This practice helps to account for any potential spikes in network fees that might occur since the transaction was initiated.
- Consider Transaction Speed: While opting for a faster transaction speed generally prevents delays, there may be situations where network fees are exceptionally high. In such cases, selecting a slower option may be more cost-effective. If you choose this route, ensure that users are informed that their transaction will take longer to complete.
- Add a Max Sell button: Our data shows that a large percentage of users choose to sell their max balance. You can reduce friction by adding a
maxbutton on a quote /Sell cryptoscreen that automatically deducts the network fee needed when selling native tokens.
Handle crypto deposits for Off-Ramp transactions
To complete a sell transaction, the customer deposits their cryptocurrency to a MoonPay-owned wallet as the last step of their journey. In the default sell journey, users will see a QR code and instructions in the widget to manually deposit their crypto. For the transaction to be completed successfully, they must ensure that the amount, cryptocurrency, network, and wallet address are all correct in their deposit, which can be an error-prone process and cause users to drop off.
For this reason, we recommend removing this point of friction by handling the crypto deposit using one of the following methods. This is highly recommended, as it provides a better user experience and improves conversion.
Method 1: Use the SDK’s onInitiateDeposit event handler
onInitiateDeposit event handlerTo enable this feature, please contact your MoonPay team.
When you register for the SDK event handler onInitiateDeposit, the MoonPay widget will instruct your application to initiate the deposit.
At the end of the sell flow, the user will use the Initiate deposit button to continue making the deposit in your app. The deposit instructions, including the transaction ID, base currency code, base currency amount, deposit wallet address and, if applicable, the respective tag will be sent from the widget to your app. Your app will make the deposit and return the corresponding deposit ID from your side.

onInitiateDeposit button in the widget
type OnInitiateDepositProps = {
  transactionId: string;
  cryptoCurrency: {
    id: string;
    name: string;
    code: string;
    contractAddress: string | null;
    chainId: string | null;
    coinType: string | null;
    networkCode: string | null;
  };
  fiatCurrency: {
    id: string;
    name: string;
    code: string;
  };
  /** Crypto amount in its base unit (0.123 ETH === "0.123") */
  cryptoCurrencyAmount: string;
  /** Crypto amount in its smallest unit (1 ETH === 1x10^18) */
  cryptoCurrencyAmountSmallestDenomination: string;
  /** Fiat amount in its base unit ($1.23 === "1.23"). Only set for fixed quotes. */
  fiatCurrencyAmount: string | null;
  depositWalletAddress: string;
};

const moonpaySdk = window.MoonPayWebSdk.init({
  flow: 'sell',
  environment: 'sandbox',
  variant: 'overlay',
  params: {
    apiKey: 'pk_test_key'
  },
  handlers: {
    async onInitiateDeposit(properties: OnInitiateDepositProps) {
      // Your own crypto deposit code
      const {
        cryptoCurrency,
        cryptoCurrencyAmount,
        depositWalletAddress,
      } = properties;
      const depositId = await deposit(
        cryptoCurrency.code,
        cryptoCurrencyAmount,
        depositWalletAddress,
      );
      return { depositId };
    }
  }
});
Method 2: Pass the redirectURL widget parameter
redirectURL widget parameterPassingredirectURLwill show a button at the end of the sell flow that saysSend with <partner name>, which the user clicks to be redirected back to your app. The deposit instructions, including the transactionId, baseCurrencyCode, baseCurrencyAmount, depositWalletAddress and, if applicable, depositWalletAddressTag, will be appended as URL parameters. List of off-ramp parameters
When
depositWalletAddressTagis included in the URL parameters, you must include this with the deposit, otherwise the transaction will fail.
redirectURL supports both normal links and app deeplinks.
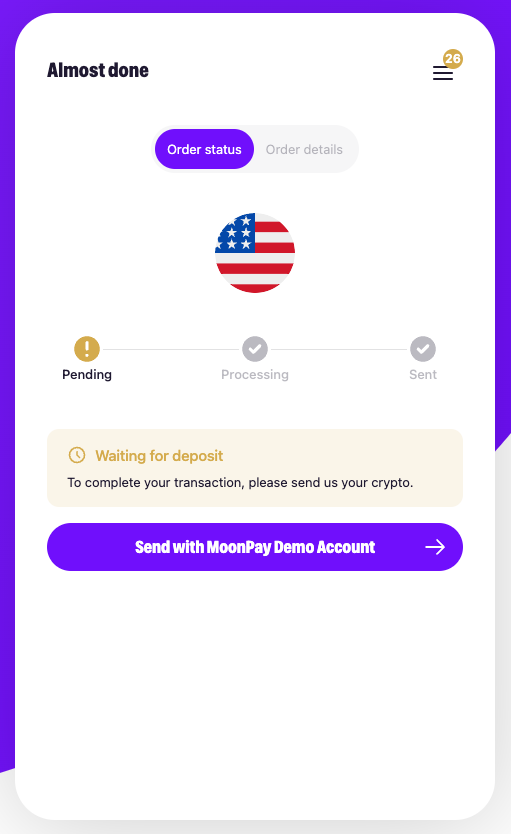
If you choose not to use redirectURL, the user will see either the WalletConnect button or manual deposit instructions outlined in the next section, depending on the base currency for the transaction.
When using redirectURL with the off-ramp, you must set up webhooks or API calls to verify the deposit instructions. Webhooks overview
redirectURL button in the widget
Other options for crypto deposits
WalletConnect
WalletConnect enables users to connect their wallet to the widget so they can sign and send transactions directly from their wallet.
This deposit option only supports ERC-20 tokens. ERC-20 tokens are cryptocurrencies built on the Ethereum blockchain, for example Ethereum (ETH) and USD Coin (USDC). Full list of supported off-ramp cryptocurrencies
For the WalletConnect button to show up, an ERC-20 token must be selected for the transaction, either by the user or with the use of baseCurrencyCode or defaultBaseCurrencyCode.
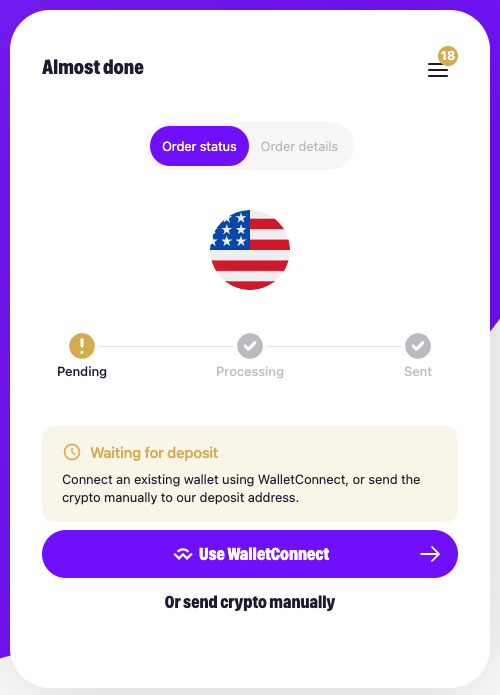
WalletConnect button in the widget
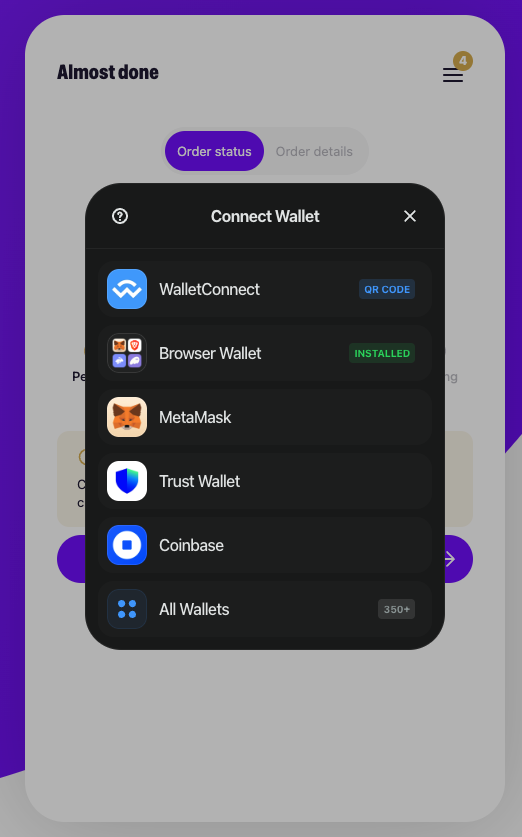
WalletConnect modal where users can choose their wallet
Manual deposits
The widget can display a QR code and deposit instructions for the user to manually deposit their crypto to a MoonPay-owned wallet.
This is the default deposit option that shows up when onInitiateDeposit, redirectURL, and WalletConnect are not in use. However, it’s highly recommended to use these options over manual deposits, as this significantly improves the user experience.
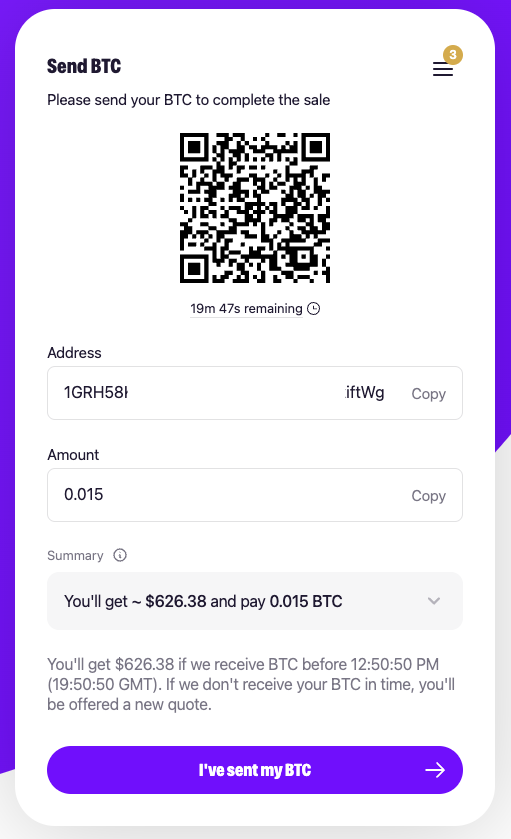
Manual crypto deposit instructions
Enhance the user experience
Pre-fill customer wallet addresses in the widget
Use the walletAddress and email parameters whenever possible. This is a major friction point for customers if they have to manually enter the crypto wallet address.
If you're leveraging either parameter you must sign the URL by appending the signature parameter to the end of the URL. Confirm all parameter values are URL encoded.
Pre-fill the base currency code and amount
Use additional parameters like currencyCode + baseCurrencyCode baseCurrencyAmount for a more seamless end-to-end customer journey.
Mobile integrations
For mobile integrations using SFSafariViewController and Chrome Custom Tabs, ensure that Apple Pay, Google Pay, and social sign-on are functional.
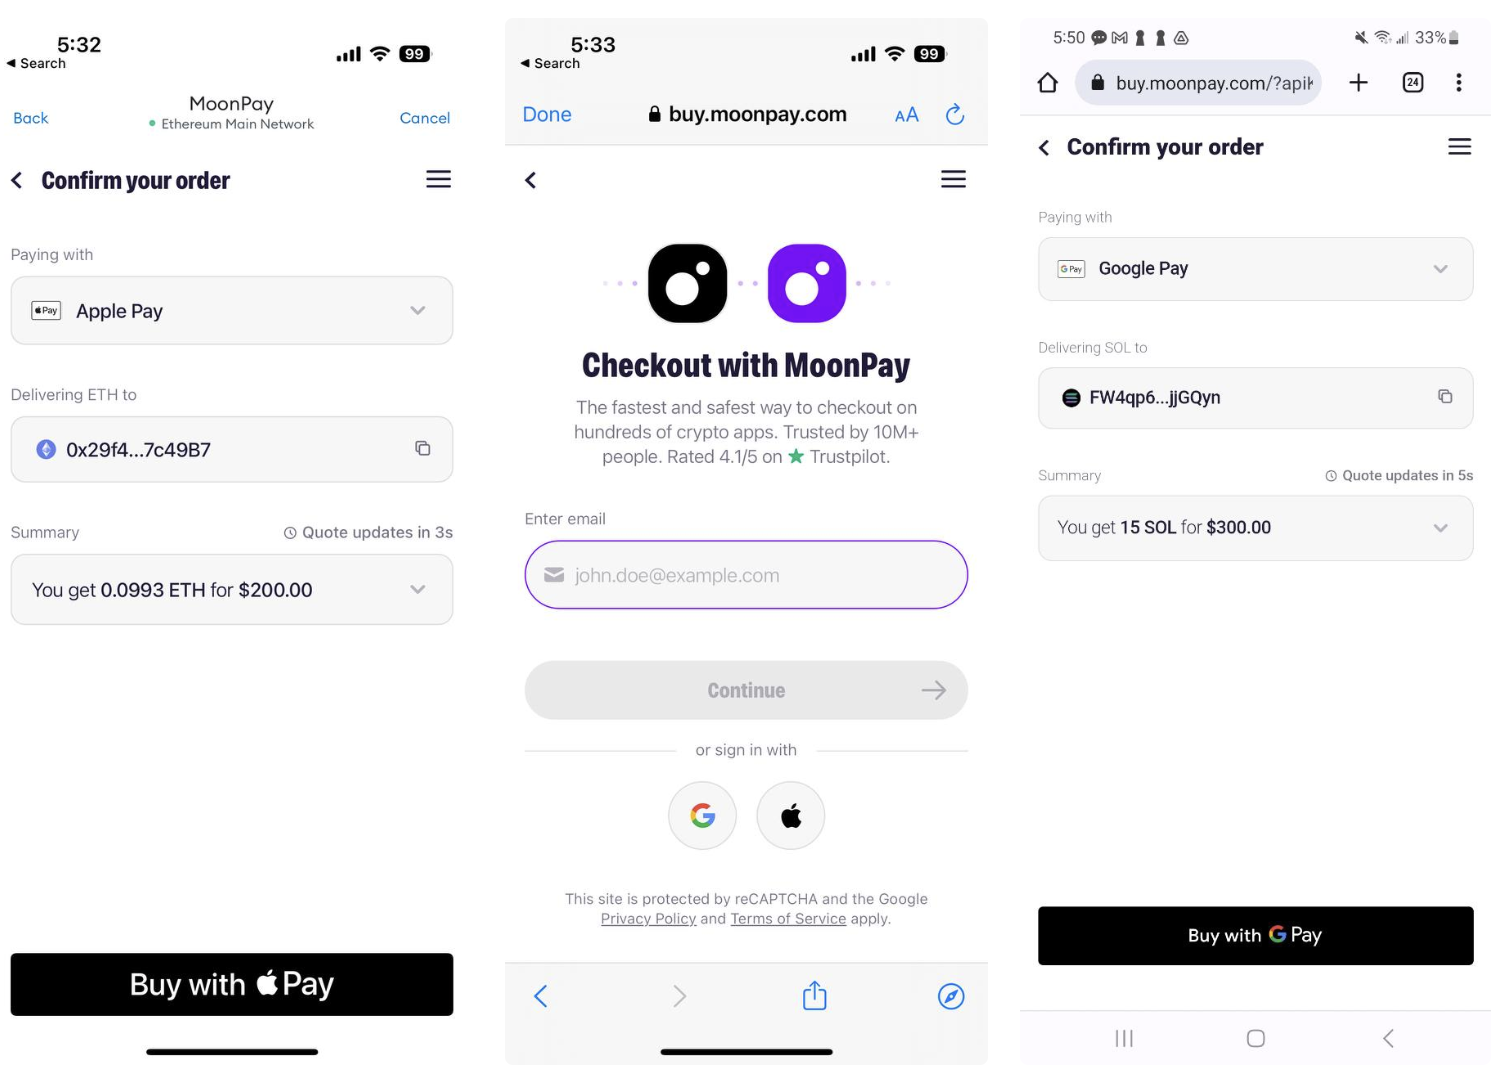
Apple Pay & Google Pay
Visible CTAs
Ensure that the MoonPay widget is fully visible. This is especially critical for calls to action like the Continue and Pay buttons, which must be visible without scrolling.
Widget colors and themes
Use the colorCode and theme parameters to match the widget to your site's look and feel.
Displaying the widget
Ensure that the MoonPay widget opens in a way that feels native to your existing user flow. We recommend opening the widget within a modal or iframe on your site. We do not recommend opening the MoonPay widget in a new tab or window.
Provide clear context for the user
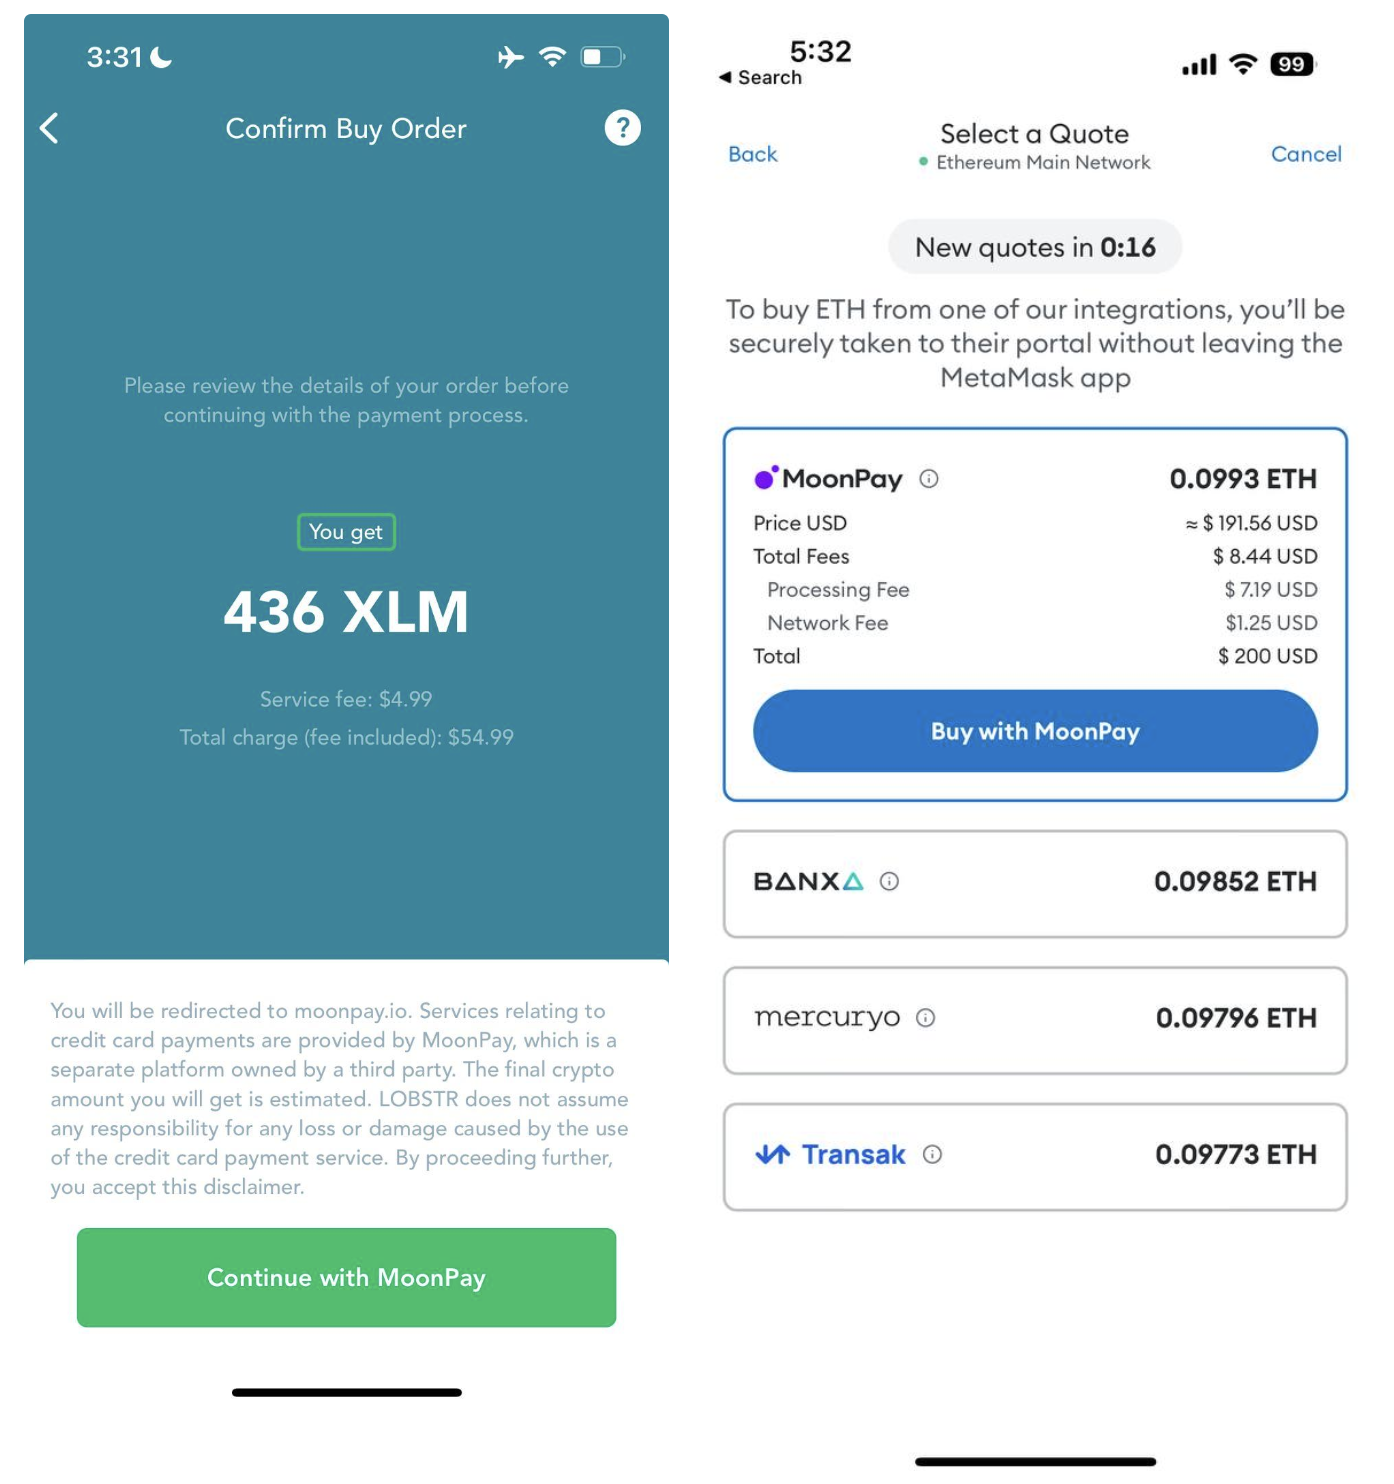
MoonPay as provider
Ensure that it's clear to the customer that they will be redirected to MoonPay to finish their transaction. A Buy with MoonPay, Swap with MoonPay or Continue with MoonPay can serve this purpose.
MoonPay logos to use in your integration can be found in our official media kit.
Payment / payout method logos
Build customer trust by displaying the supported payment / payout method logos for your integration. For customers new to crypto, these familiar payment methods can indicate a safe checkout process.
Download these logos as a ZIP file and check the supported payment / payout methods below:
Eliminate extra steps
Identify and eliminate any extra steps the customer must complete before reaching MoonPay, such as entering excessive personal information. Customers don't like to enter the same information twice.
Use MoonPay's API
To help customers make informed decisions, use MoonPay's API to retrieve and display limits, quotes and real-time price updates. You can also show the customer's transaction history in your app.
Optimize MoonPay visibility and placement
Homepage entry point
Promote MoonPay's presence on your app's homepage by including a Buy Crypto or Swap button, which can significantly boost conversion rates. Our analysis has shown a single home page button can improve conversions as much as 80%.
Other entry points
We strongly recommend including multiple Buy or Swap buttons including the customer's wallet, NFT purchase section, trading page or other cryptocurrency-specific pages.
Logo placement
Ensure MoonPay’s logo is easy to find, with prominent placement within your app. The more easily customers can identify the brand, the more likely they'll convert.
Correct capitalization
Ensure the copy says MoonPay and not Moonpay
Badges for returning customers
Guide returning customers with simple reminders. While securing the best price is important, many customers prioritize a quick purchase over the hassle of signing up with a new provider.
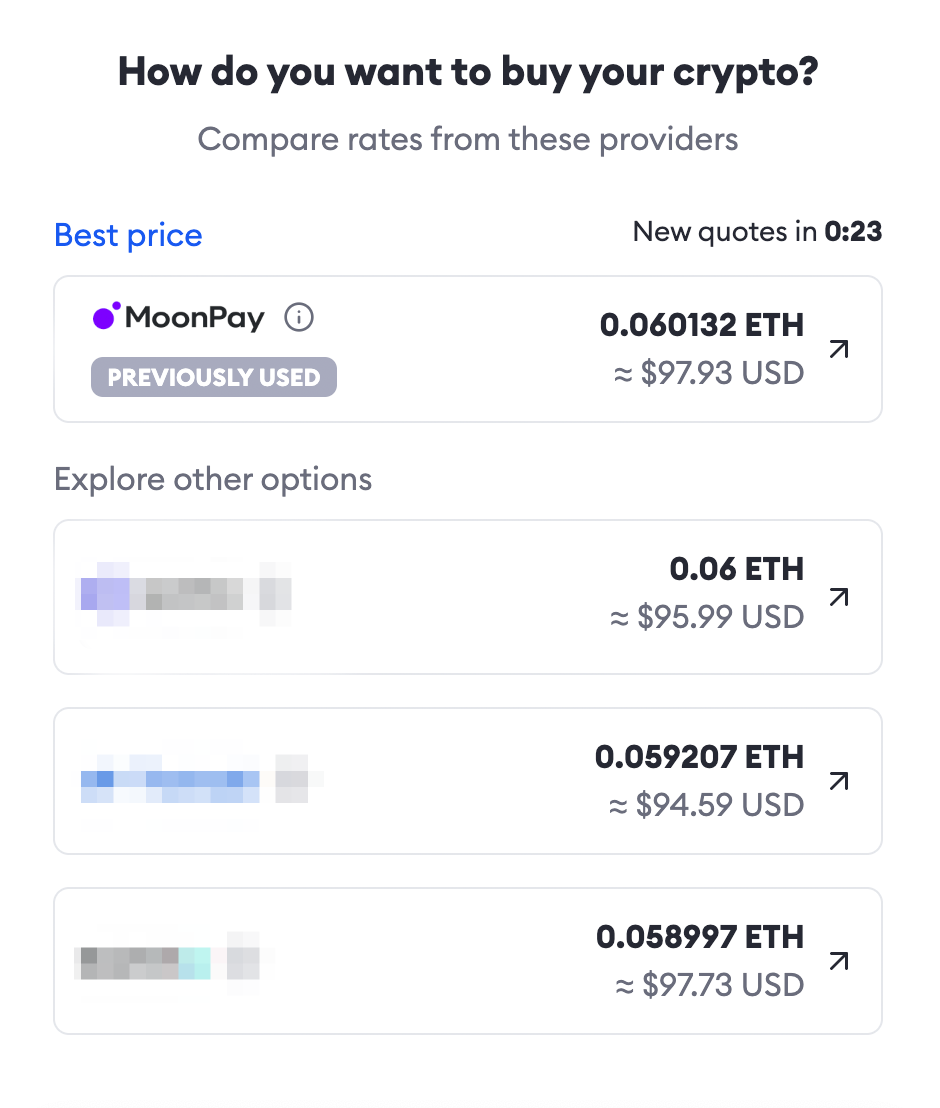
Including a "Previously Used" prompt as a helpful reminder
To determine if a user is a repeat customer of MoonPay, you must combine MoonPay's transaction data with your own. Partners can leverage the externalCustomerId widget parameter to pass any value they want. MoonPay will store this information and enable you to perform searches using the provided externalCustomerId or MoonPaycustomerId values.
After storing the data, you can use our Customers API to access the KYC status of a user through the identityCheckStatus field. It is then your responsibility to link this status with your own database, allowing you to determine if the user has a transaction history with MoonPay.
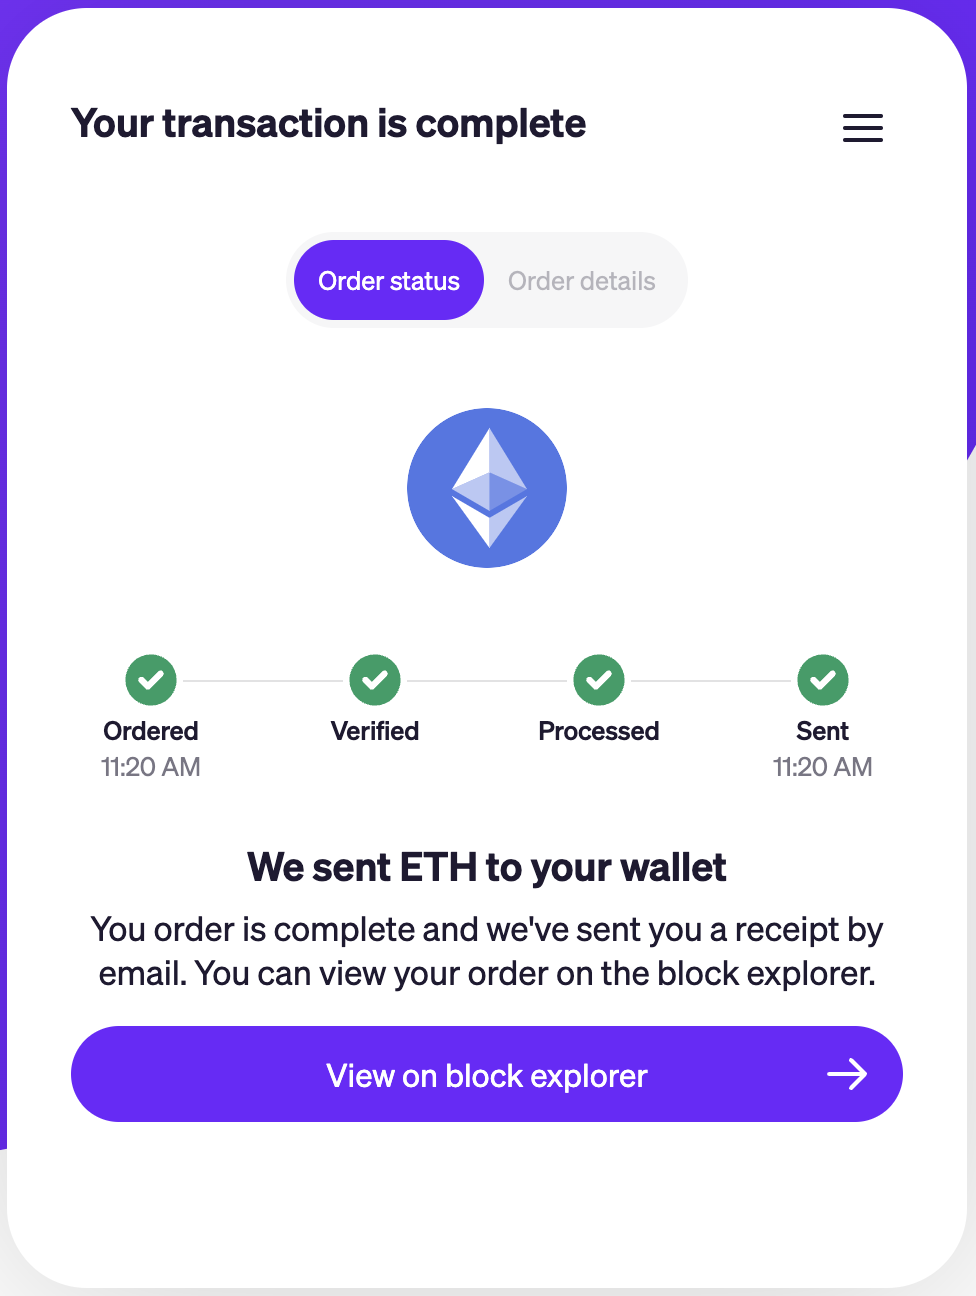
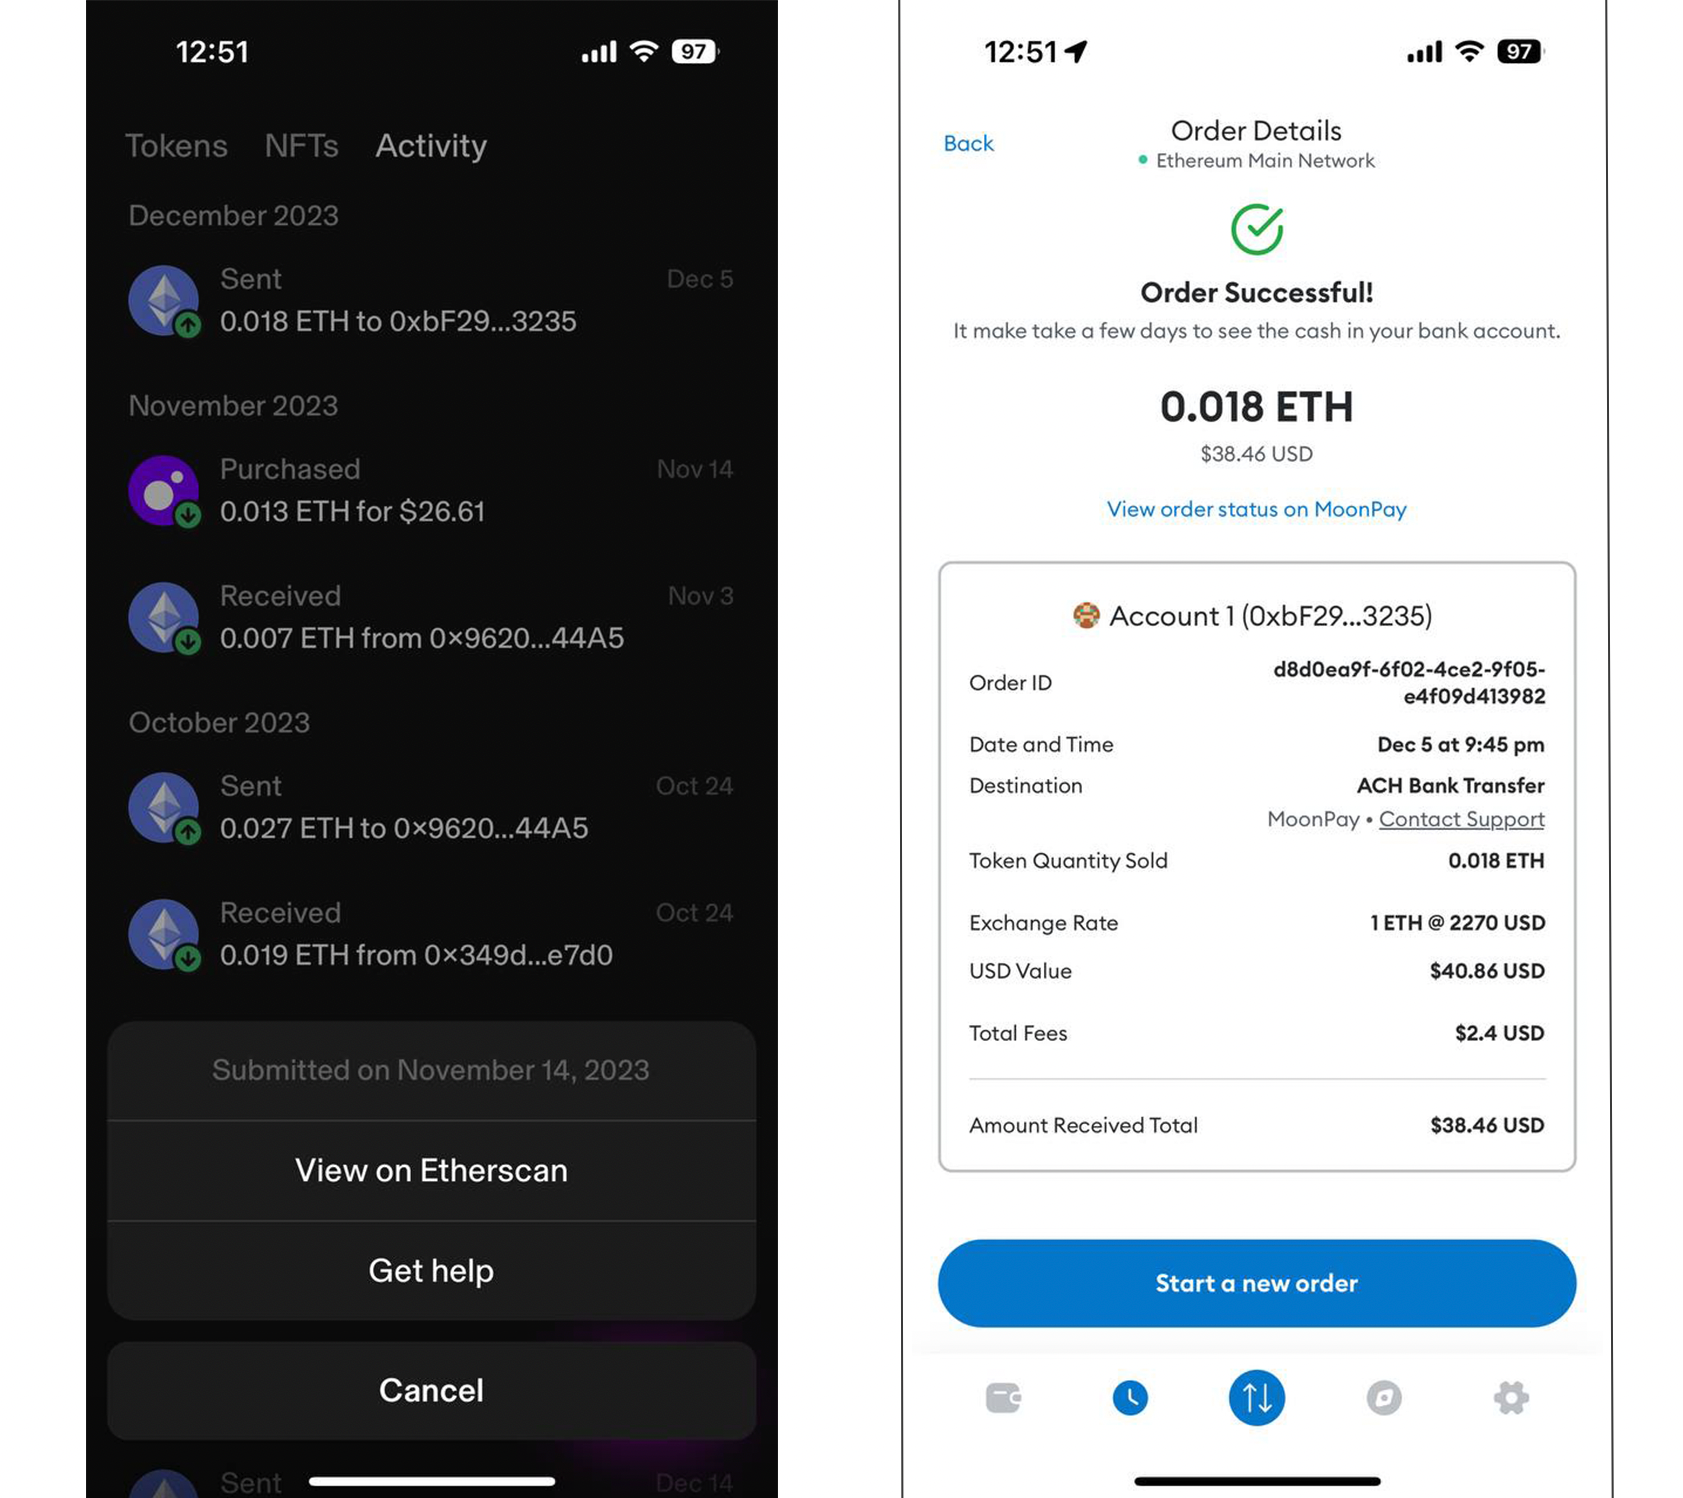
Tracking the order status
Following the initiation of a purchase or sale, it is crucial for users to have the ability to monitor their order's progress to avoid any uncertainty about the status. MoonPay facilitates this through the use of webhooks and APIs. Webhooks provide real-time order updates to a specified endpoint of your choice, while the API allows for on-demand retrieval of the latest order status.
Both our webhooks and API offer consistent data, giving you the flexibility to employ either or both methods as per your requirements.
- Utilize the MoonPay transaction status URL:
https://buy.moonpay.com/transaction_receipt?transactionId=45751523-c3e2-47a5-ad0f-e5cb89e94037
- Utilize your own transaction status: Should you opt to manage the transaction status on your own, you can easily do so by using the transaction details provided by MoonPay.
cryptoTransactionId- the on-chain transaction hash that you can input into etherscan.io or other blockchain explorer tool.status&type- the order status details. Additional information can be found here.id- the unique MoonPay transaction ID. Can be added to the MoonPay transaction receipt URL.<https://buy.moonpay.com/transaction_receipt?transactionId=45751523-c3e2-47a5-ad0f-e5cb89e94037>externalTransactionId- An identifier you would like to associate with the transaction. This identifier will be present whenever we pass you transaction data.createdAt- timestamp of when the transaction is first created.currency.name¤cy.code- the cryptocurrency Name and code e.g. Ethereum and ETH
Additional examples and details for all parameters can be found in our transaction API documentation under the 200 Responses section.
Updated 6 months ago